Roasted Green Tomato Galette with Tofu-Walnut Ricotta (Vegan)

What’s the weather like where you are? Here in Maryland, we’re experiencing an uncanny second summer: 80˚+ temperatures in the middle of October. Heat-lover though I am, I can’t quite get behind this divergence from the natural progression of the seasons.

I’d already started preparing my garden for the winter — trimming back unruly tomato vines, pulling dead plants — when the temperature skyrocketed. But with this return of the heat, tomatoes I’d long since given up for green are getting a second chance to ripen. I’d already picked some of the larger green ones, thinking that even a week of warmth wouldn’t be adequate for those big ones. And so, here I am with  a few pounds of green tomatoes of all shapes and sizes.

After trying my hand at that Southern classic, fried green tomatoes, and finding them lackluster, I knew I couldn’t rely on traditional uses for my unripe fruit. What to do? How about a galette, where green tomato slices are roasted to tangy perfection and layered atop a creamy tofu ricotta base? Seasoned lightly and ensconced in a crunchy cornmeal-laced crust, this is the perfect way to elevate those green tomatoes to the level of their more revered ripened brethren.

This recipe requires three components and might seem time-consuming. But individually, each piece is relatively simple, and the ricotta can be made ahead and let sit overnight. The result is a flavorful yet sturdy green tomato tart that you can slice and eat like pizza — no need to dirty a fork.

Roasted Green Tomato Galette with Tofu-Walnut Ricotta / #vegan / govegga.com

Roasted Green Tomato Galette with Tofu-Walnut Ricotta

Serves two as a main and four as a side

Ingredients

For the tomatoes

  • 12 oz. green tomatoes (about 6 small tomatoes) sliced into ~1/8″ rounds
  • 1 T olive oil
  • 1-2 T balsamic vinegar (I prefer less, but you might not!)
  • 1/2 tsp sugar
  • 1/4 tsp salt
  • 1 tsp dried oregano
  • A few grinds black pepper

For the crust

  • 1 cup unbleached all-purpose flour
  • 1/3 cup cornmeal
  • 1/2 teaspoon salt
  • 1 teaspoon dried oregano
  • 1/3 cup olive oil, chilled (refrigerate it for a few minutes before starting the recipe)
  • 1/4 cup cold water

For the tofu-walnut ricotta

  • 1 block extra-firm tofu, drained
  • 1/3 cup roughly chopped walnuts (you can omit these if you’d like; see Notes)
  • 1/4 cup nutritional yeast
  • 2 cloves garlic, minced
  • 1/2 tsp salt
  • 1 T lemon juice
  • 1/2 T olive oil
  • 2 tsp white or yellow miso
  • A few grinds black pepper
Method

Preheat the oven to 350˚F. Line a baking sheet with aluminum foil.

While the oven is preheating, prepare the tomatoes. In a large bowl, drizzle the sliced tomatoes with olive oil and balsamic vinegar, tossing gently to coat. Sprinkle the sugar, salt, oregano, and pepper on top and stir again to coat.

Pour the tomatoes onto the prepared baking sheet and roast for 20 minutes. At the 10-minute mark, shift the tomatoes around gently.

While the tomatoes are roasting, prepare the crust and the ricotta.

To make the crust:

In a large bowl, stir together the flour, cornmeal, salt, and oregano. Drizzle in the olive oil, and use clean hands, a fork, or a pastry cutter to work in the oil until it forms sandy  crumbs. Drizzle in the cold water and stir to combine, using your hands to knead if necessary. Work it gently until it comes together into a soft dough, but do not overwork. Form into a ball and place in the refrigerator, either wrapped in cling film or with a tea towel.

To make the tofu-walnut ricotta:

Use your hands to gently wring out any extra liquid from the tofu, then crumble it into a large bowl. Add remaining ingredients and use your hands, a spatula, or a wooden spoon to thoroughly combine. If possible, let sit for 30 minutes before using to let the flavors develop (though this is not necessary).

When the tomatoes are lightly browned and bubbling, remove them from the oven and set aside. Increase the oven temperature to 375˚F while you prepare the tart.

On a clean, lightly floured surface, roll out the dough into a rough circle or oval about 1/8″ thick. Transfer to a baking sheet dusted with cornmeal. (This is a delicate dough, so rolling directly on parchment paper or on the sheet might make this step simpler.) Leaving a 1 1/2″ border, pile about half the ricotta in the center, then layer the tomato slices on top, overlapping slightly. Fold the edge of the dough over the filling.

Bake for 40-45 minutes, just until the crust starts to brown.

Roasted Green Tomato Galette with Tofu-Walnut Ricotta / #vegan / govegga.com

Notes
  • If possible, make the ricotta the day before to let the flavors develop and to save time.
  • This recipe requires a half batch of the ricotta, so you can either halve the recipe or save the remaining ricotta for another day. (Stuffed shells, anyone?)
  • I included walnuts in the ricotta to add texture and a little extra protein. They’re not necessary, so feel free to leave them out.
  • You can use more tomatoes if you have them on hand.

Disclaimer: his post includes affiliate links. If you purchase something through my link, it costs nothing extra for you, but I get a few pennies to help cover hosting costs.

Save

Chewy Vegan Coconut Cookies

Let’s not talk about the fact that Labor Day weekend has come and gone, okay? Instead, let’s talk about chewy, melt-in-your-mouth rich vegan coconut cookies. The kind of cookies you could bring to a gathering of even the staunchest omnivores and feel good about. The kind of cookies that you just want to keep on eating and eating and eating, even when your stomach groans in protest.

I’ve made these cookies three times in the past few weeks, twice to share at events, and they haven’t let me down. I’ve basically veganized this recipe, toned down the fat and sugar just a bit, and tweaked a few other things to my taste. I highly recommend using shredded (not flaked!) coconut — it seems to melt into the cookies, providing them with coconutty goodness, without those noticeable flaky bits that might distract from your eating pleasure. (I buy it at Wegmans, but Amazon also carries shredded coconut from Bob’s Red Mill.) Adding the coconut early on helps it soften up and become infused with the creamed sugar and butter. The result is a true delight.

chewy vegan coconut cookies

Almost as good as the final product? The fact that this recipe is so, so easy — you can make it in a single bowl, plus a small one for mixing up your flax egg. I use my KitchenAid stand mixer, but a hand mixer or even good old-fashioned elbow grease will do the trick.

If you’re feeling decadent, I bet these would be amazing drizzled with chocolate… but I’ve been too impatient to try that!

These tropical treats are a perfect vegan Memorial Day recipe, and they work equally well as a vegan Labor Day dessert. Heck, they’re good any old time!

Chewy Coconut Cookies
Makes ~18 cookies

  • 6 T Earth Balance buttery sticks, softened
  • 1/2 C brown sugar
  • 1/4 C white sugar
  • 1 tsp vanilla extract
  • 1 flax egg (1 T ground flax mixed with 3 T warm water)
  • 1 cup unsweetened shredded coconut
  • 1 cup unbleached all-purpose flour
  • 1/2 tsp baking soda
  • 1/2 tsp baking powder
  • 1/2 tsp salt

Preheat the oven to 350˚F and have two cookie sheets ready to go. (You can line them with parchment paper if you’d like; it’s not necessary, but if your sheets are finicky, feel free to try it.)

First, make the flax egg by whisking the ground flax with the water until combined. Set aside.

In your stand mixer (or using a hand mixer or your own brute strength), cream together the Earth Balance, sugars, and vanilla until well combined; it should take two to three minutes. Pour in the flax egg and mix for another 15 seconds or so.  Add the shredded coconut and mix on low until it’s folded in to the creamed butter and sugar.

With the stand mixer (if using) off, add the flour, baking powder, baking soda, and salt, then mix on low until all ingredients are incorporated. It should take just a minute.

Scoop rounded tablespoonfuls of dough onto your cookie sheet, leaving about 2″ between each cookie. Press down slightly. Bake for 10 minutes, and let cool for another 5 before removing from the cookie sheet.

Enjoy!

chewy vegan coconut cookies

Note: This post contains affiliate links. If you purchase something through my link, it costs nothing extra for you, but I get a few pennies to help cover hosting costs.

Back to Basics: How to Cook with Tofu

back to basics -- how to cook with tofu; how to use tofu

The very first time I cooked tofu was, to put it mildly, an unpleasant experience. I’d been a vegetarian for nearly five years at that point and really should’ve known better, but alas: I made the classic error of purchasing silken tofu instead of regular tofu. (Not sure why that’s such a big no-no? This post is for you — read on!)

There I was, a college senior excited to be mostly off the meal plan and to cook for myself at the townhouse I shared with two of my best friends. My college was in walking distance of a lovely co-op, and I’d purchased the tofu with stars in my eyes, ready for a meat-free meal I’d share with my friends to wow them. As I basted the slices of tofu with barbecue sauce, their squishy jiggliness should’ve been a dead giveaway that something was amiss. “Maybe they’ll firm up in the oven,” I thought.

Of course, there was no magic firming action, and my baked tofu slices came out just as jiggly as their unbaked selves… except they now had a very thin, chewy crust of barbecue sauce on them. Not exactly the gourmet dinner I’d been envisioning.

Needless to say, this was not a meal I shared with my friends.

Seven years later, I’ve come a long, long way in my tofu knowledge. It’s now a staple in my kitchen, and I use it every which way, in all its forms, for savory and sweet recipes alike.

So today, let’s get back to basics and talk all about tofu! Read on for tips on how to cook with tofu, which type to use, and how best to take advantage of everything this beautifully neutral protein has to offer.

Green beans and tofu in a spicy sauce -- how to cook with tofu.

A much better use of tofu.

What is tofu?

Simply put, it’s bean curd. Less simply put, it’s “a food made by coagulating soy milk and then pressing the resulting curds into soft white blocks.” (Thanks, Wikipedia.) It’s been used for thousands of years in various East Asian cuisines, and happily made its way to the western world in the late 19th century. That’s good news for us western vegans, because tofu is high in protein (with about 40 grams in a 14 ounce block) and often calcium (because it’s frequently treated with calcium sulfate, a coagulant).

Tofu comes in a few varieties, which can be hard to keep straight at first.

  • Silken tofu. This is very soft and almost gelatinous in texture. It’s quite delicate; silken tofu falls apart easily and easily blends into something like a cream. (And it’s what I mistakenly used in place of regular firm tofu!) Within the category of silken tofus are different levels of firmness. For example, you can find soft silken tofu and firm silken tofu, but remember that any kind of silken tofu will be softer and more delicate than regular firm tofu. Silken tofu is available in both shelf-stable and refrigerated varieties. I personally use them interchangeably.
    • Shelf-stable silken tofu comes in small boxes and doesn’t need to be refrigerated. You can keep it in your pantry for quite a while.
    • Refrigerated silken tofu needs to be, well, refrigerated. The block of tofu is packed in water in a sealed plastic container.
  • Regular (firm) tofu. This is much hardier than silken tofu and almost grittier. It’s always refrigerated, packed in water in a sealed plastic container. The most common varieties are firm and extra-firm, although you might see super-firm. You can also find sprouted tofu, which is made from soybeans that were allowed to sprout first.

Where can I buy tofu?

Good news — most grocery stores sell tofu. Even big-box chains usually have at least one variety. Fresh tofu needs to be refrigerated, so it’s typically shelved by the dairy or veggie section. (If the store sells faux meats, they’ll usually be here too.) Shelf-stable silken tofu is typically housed with the Asian foods. (Mori-Nu is the most common brand.)

At health food stores, co-ops, and other specialty stores, you might want to check the faux-meat/non-dairy section to find refrigerated tofu. Just ask if you can’t find it! Shelf-stable tofu will likely still be alongside Asian ingredients.

At Asian markets and some health food stores, you might get lucky enough to find fresh tofu. You can get it in the refrigerated section, usually stored in a big bucket filled with so-called tofu water. In this case, the store will usually have plastic bags available for you to transport the tofu. (You could also bring your own container.)

Finally, recall that not all silken tofu is shelf-stable — in other words, you might find silken tofu in the refrigerated section, right alongside the firmer tofu. Always double-check the label, or you might end up making a mistake similar to my college-era error! ;)

What kind of tofu should I use?

To avoid mishaps, follow these general tips:

  • If using a recipe, heed the author’s advice! Any quality recipe will tell you what kind of tofu to use. It’ll usually be written like “extra-firm tofu” (meaning the extra-firm variety of the regular kind) or “soft silken tofu” (meaning the soft variety of the silken (usually shelf-stable) kind). So you need to know the kind (regular vs. silken) and the level of firmness (e.g., soft, firm, extra-firm).
  • If a recipe calls for extra-firm regular tofu but you can only find firm, don’t sweat it. You can usually substitute a softer tofu by being a little gentler with it and making sure to press it. (More on that below.)
  • In general, savory recipes use regular tofu (because the tofu is a specific component of the meal, designed to stand on its own) whereas sweet recipes use silken (because it’s going to be blended up to create a creamy texture, like in a pudding or cream pie). This is not a hard and fast rule, of course, so always read the recipe and ask the author if you have questions.
Eggless tofu sandwich -- how to cook with tofu.

Tofu for lunch.

How do I prepare tofu?

  • Press it. If you’re using firm or extra-firm regular tofu, the recipe might call for it to be pressed. Why would you do this? Well, pressing the tofu squeezes out the excess liquid, improving the texture and getting the tofu ready to soak up more delicious marinade or seasonings. Is it necessary? Strictly speaking, no. But it does tend to improve the overall consistency and mouthfeel, especially when it’s a main component of your meal. How do you do it? There are a few methods:
    • The old-fashioned way. Wrap a block of tofu (the regular, refrigerated kind, remember?) or individual slices of the tofu in either a regular towel or paper towels. Put it on a shallow plate and put something heavy on top of the wrapped tofu. People often use books for this. The goal is to squeeze and drain all the water you can. The longer you press your tofu, the better, but if you don’t have 24 hours to spare, any time at all will help.
    • The new-fangled way. Get yourself a fancy-schmancy tofu press! There are a few designs on the market, but I use a Tofu Xpress Gourmet Tofu Press. It served me well for years, although recently the plastic spring housing broke and I’ve yet to replace it. There are some simpler, less expensive options available (like this EZ Tofu Press), but I can’t vouch for them personally.
  • Freeze it. When you freeze tofu, the texture magically changes into something a little more toothsome. Simply take regular tofu out of the package, drain it, press it (or not), and freeze it in a freezer-safe container. When you’re ready to use it, thaw it in the fridge for about 8 hours ahead of time. (You can also try to thaw it in the microwave if you’re short on time, but I don’t recommend this.)
  • Marinate it. People like to describe tofu as a sponge because it’s always ready to soak up delicious flavors. I personally find that description a little off-putting, but it’s also spot-on. You can use any marinade or flavor combo you’d like (see below for suggestions). Here are some tips for infusing your tofu with as much flavor as possible.
    • Slice or cube the tofu to increase surface area. Marinating a whole block won’t be as efficacious as marinating individual pieces.
    • Use a fork to poke tiny, not too deep holes so the marinade has more of a chance to permeate.
    • Start marinating as early as possible, but don’t sweat it if you only have 15 minutes. It’s better than nothing, and it’ll still help!

How do I cook tofu?

Pshhh, don’t cook it at all — eat it raw! Just me? Okay then. If you’re set on cooking your tofu, here are some basic methods.

  • Bake it. You can’t go wrong with baked tofu. I like to bake marinated cubed or sliced tofu at 400˚F for 20-30 minutes, flipping once on each side. To get nice crispy edges, be sure to use a shallow pan (better yet, one without rims) and use a little oil or aluminum foil underneath the tofu.
  • Dry-fry it. If you’re avoiding oil or just want a super-simple way of preparing tofu, this is the method for you. At the end, you’ll have chewy, golden-brown tofu. Keep in mind, though, that this is for plain tofu, not flavored, so it’s best in a recipe with lots of other flavors going on. This is the method I use.
  • Pan-fry it. Unlike the previous method, this one uses a little oil and works great with marinated tofu. It couldn’t be simpler: Heat 1-2 tablespoons of your favorite oil (vegetable, olive, or coconut all work, although coconut will add a little flavor) in a nonstick or cast-iron pan, then add the tofu and cook for 7-10 minutes, flipping every so often, over medium. Every pan and every stove is different, so keep a watchful eye on your tofu as it cooks. You don’t want it to burn, but you do want it to start crisping up. Once you get the hang of how your setup works, you can adjust the amount of oil and heat level.
  • Scramble it. Vegans freaking love scrambled tofu. It’s a protein-packed stand-in for eggs that can be prepared so many ways and with so many different flavor profiles. I’ll include some recipes below, but at its core, scrambled tofu is just what it sounds like: crumbled tofu mixed with seasoning and often additional liquid, cooked like you’d cook scrambled eggs.
  • Grill it. Got a grill? You’re in luck — tofu stands up well to heat! Marinated tofu is great on the grill, but make sure to keep the slabs nice and thick so they don’t fall apart. You can also use it in kebabs with lots of veggies! For tofu cooked directly on the grill, make sure the grill is well-oiled and opt for lower heat and a longer cooking time (~20 minutes should do it). Remember to flip occasionally, especially if you want sweet cross-hatch action.
Marinated Tofu Sandwich -- how to cook with tofu

A tasty way to enjoy marinated, pan-fried tofu.

Okay, sold — I’m ready to cook! What are some great tofu recipes?

Yes! Here’s the fun part. These are some of my favorites.

  • Scrambled tofu. There are two main styles: egg-like and, well, tofu-like.
    • For a classic vegan tofu scramble, start with this recipe (yes, you can use soy sauce instead of the shoyu). Once you get the basic method down (sauté veg, add tofu and spices, scramble till your preferred level of doneness), you can play around with ingredients and flavor palettes. Try this one for a full-bodied scramble packed with veggies, or this red-curry version for something Thai-inspired.
    • For a more scrambled-egg-like tofu (one that doesn’t included added veggies and works great as a side dish for brunch), you just can’t beat the Tofuevos recipe from Vegicano. (Tip: reduce the soy sauce if you’re salt-averse.)
  • Tofu that stands on its own. Ready to show off your mad tofu-cooking skills? Read on!
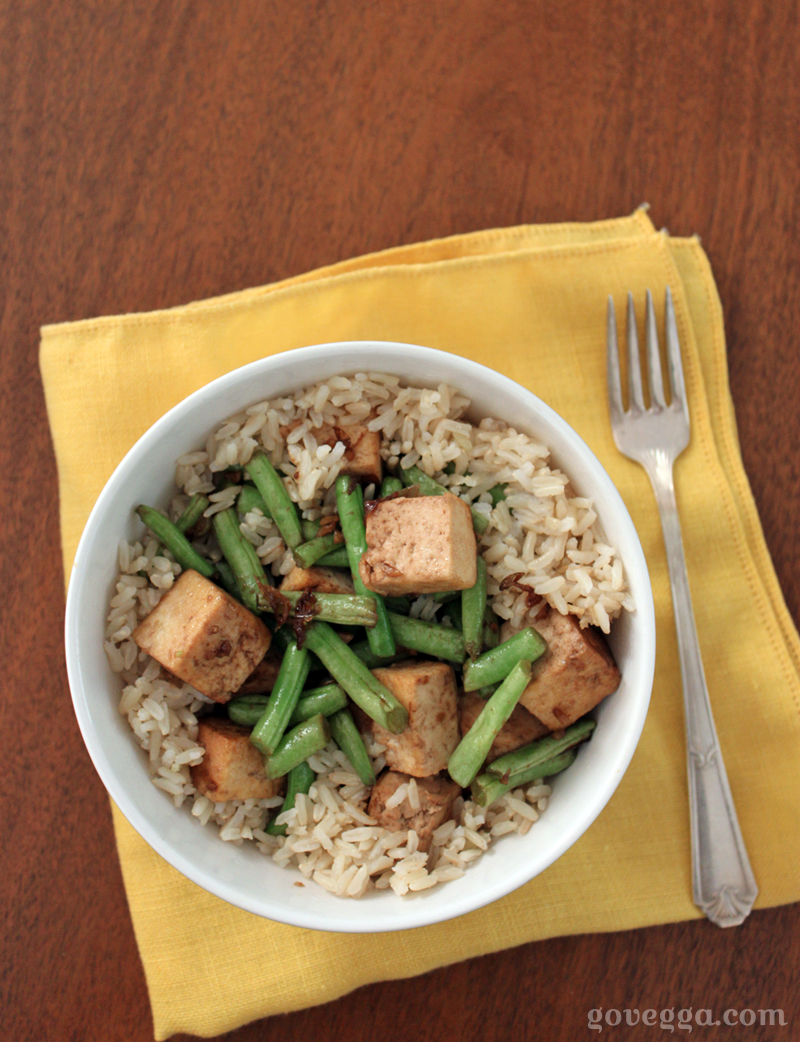
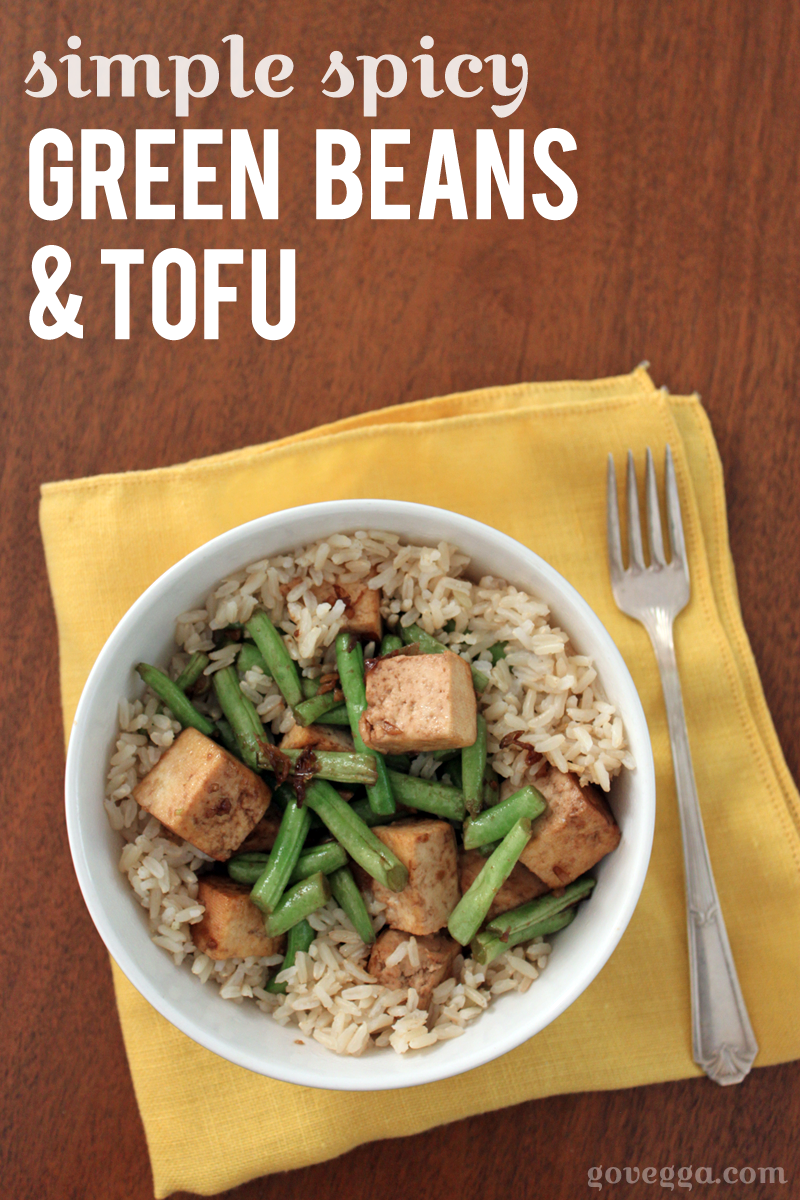
  • Tofu that shares the spotlight. Tofu is an integral part of these recipes, but it works alongside other ingredients to create a final product that’s greater than the sum of its parts.
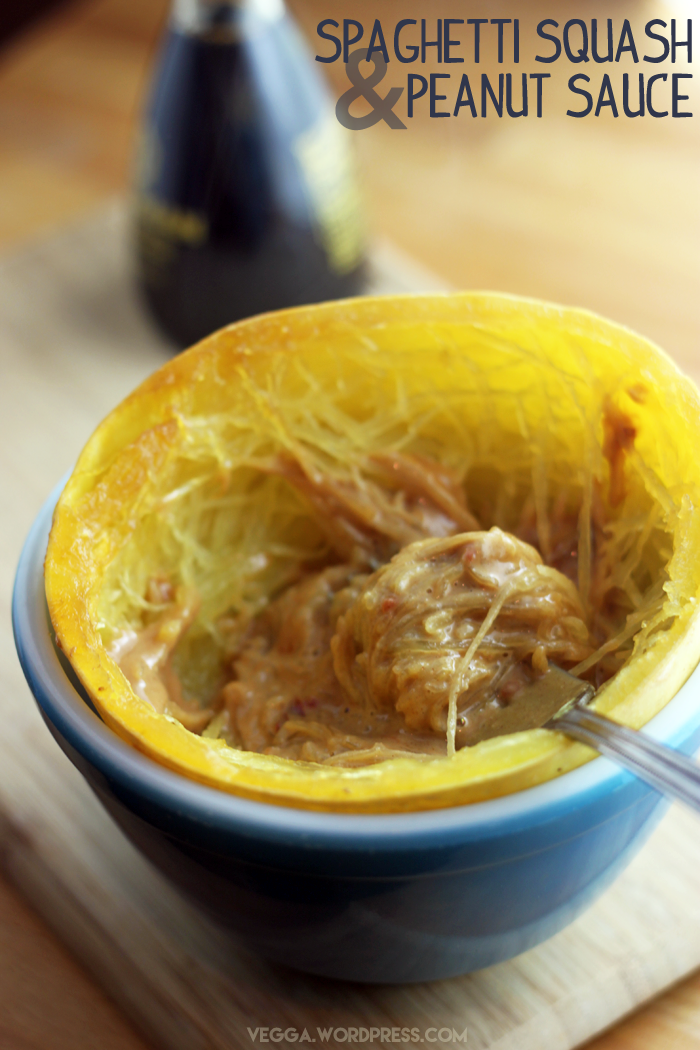
  • Tofu that’s masquerading as something else. This versatile protein easily plays many roles.

Where can I learn more?

Books, duh. Here are some you should check out from your library. (I haven’t personally read or used them all, but they seem worth a look!)

  • 101 Things to Do with Tofu by Donna Kelly and Anne Tegtmeier. I owned this book for a while and was impressed by the range of recipes. It’s vegetarian, not vegan, but many of the recipes are easily veganizable.
  • The Great Vegan Protein Book by Celine Steen and Tamasin Noyes. The dynamic duo is at it again with recipes that focus on protein — and unsurprisingly, many of them feature tofu. We own this cookbook and it has quite a few neat ideas.
  • Making Soy Milk and Tofu at Home by Andrea Nyugen. I know, I know — we just covered how to use tofu at all, never mind how to make it from scratch! But this looks like such a neat deep-dive into soy-based foods, and I’d imagine that homemade tofu has a depth of flavor unmatched by its store-bought counterpart.
  • The Tofu Cookbook for Vegans: 50 Vegan-Friendly Tofu Recipes by Veganized. (Yeah, I dunno what’s up with that byline either.) This is a bit of a wild card, but I love the idea of a cookbook dedicated solely to vegan tofu recipes. If you try it out, let me know what you think!
  • Tofu Cookery (25th Anniversary) by Louise Hagler. I’m almost ashamed not to have at least looked through this book — it’s a bit of a legend. Even Isa Chandra herself name-drops it on occasion!

But isn’t soy bad for you?!?

Nope. See here, here, here, and here.

~~~

Okay — what did I miss?! Or do you feel ready to conquer tofu cookery? Let me know!

PIN IT

beginnersguide_tofu

Note: This post contains affiliate links. If you purchase something through my link, it costs nothing extra for you, but I get a few pennies. I’m not looking to make a fortune, just to cover hosting costs. :)

Save

Save

Save

Simple Spicy Green Beans and Tofu

Two  months ago, Steven and I bought a house. We’d been looking for for something old, with lots of character, in the country(ish).

We bought an early ’70s midcentury-inspired, contemporary-as-all-heck house in the suburbs. And we love it.

What I love perhaps most of all is having a beautiful backyard where I can garden and my pups can hang out. My wonderful parents came down to help us move, and my dad built us two raised garden beds. He also brought plants galore and taught me all about the best ways to transplant various little plantlings. (It pays to have a master gardener who spends most of his free time at a greenhouse for a dad!) We planted relatively late in the season and had a little deer-eating-all-the-baby-tomatoes incident, but things are finally starting to pick up out there. I have more basil than I know what to do with, and everything is coming in beautifully. I love it. Just look at these sweet filius blue peppers — aren’t they cute?!

View this post on Instagram

Cutest lil peppers that you ever did see.

A post shared by Kelly (@kelmishka) on


I also love living a mile from a wonderful weekend farmers’ market. On Saturday mornings, I walk over to the market to stock up on lush fresh veg and fruit, then treat myself to a cold-brew coffee from Brewing Good Coffee Co., a local craft coffee roaster that just happens to be run by vegans. (Their motto is “Drink coffee. Save animals.” Done.) By the time I get home, I’m extra sweaty from being weighed down by all that veggie goodness, but at least I’m caffeinated!

This Saturday, I picked up a big ol’ carton of green beans and knew I had to gobble them up right away. They starred in a spicy dish alongside some tofu and hot peppers from the garden (not the ones in the photo above). I finished everything off with a nice spicy sauce and served over brown rice. Yes, this recipe is super simple — in fact, it’s barely a recipe at all. But this time of year, when all this gorgeous produce is in its prime, I like meals that are simple enough to let the veggies shine. Plus, who wants to spend hours in the kitchen when the sun is shining and you’ve got a backyard calling your name?! :)

Green beans and tofu star in this simple, spicy vegan dinner.

Simple Spicy Green Beans & Tofu
Serves 2-3

  • 1 T coconut oil
  • 1 T freshly grated ginger
  • 2-3 large cloves garlic, minced
  • 2 small purple cayenne hot peppers, diced OR 1-2 t dried red pepper flakes*
  • 2 T low-sodium soy sauce
  • 1 T brown sugar
  • 1 tsp seasoned rice vinegar
  • 1 lb extra firm tofu, cubed
  • 1 lb green beans, chopped or snapped into roughly 1″ pieces

Melt the coconut oil in a large saucepan over medium-low heat, then add the ginger, garlic, and pepper/pepper flakes. Cook for about 3 minutes, or until the garlic starts to brown, then add the tofu.

Cook the tofu over medium-low for 7-10 minutes, turning every few minutes, until the cubes start to get crispy and golden. Keep the heat on medium-low so the tofu doesn’t burn.

Add the green beans to the saucepan and cover. Cook for another 3-4 minutes.

Remove the lid and pour in the sauce. Stir to coat, and cook for another minute or two until the sauce is absorbed. Serve immediately over brown rice.

*You can really use any fresh hot pepper you’d like — I just happened to have two of these little guys ripe and ready to go.

~~~

What’s your favorite easy summer veg-forward dinner?

Note: This post contains an affiliate link. If you purchase something through my link, it costs nothing extra for you, but I get a few pennies.

How to Make Lentil Soup Without a Recipe

lentil soup template

As the DC area grimly prepares for its first blizzard of the season (and, really, our first significant snowfall of the season!), I’m positively gleeful about the impending weather. It weirds me out that we’ve made it halfway through January without snow, and I’m ready to get snowed in. I’ve got good books, good coffee, and good soup to see me through.

Call me plain, but I love a solid lentil soup. I don’t know the last time I’ve used a recipe to make one, though; I usually see what I’ve got in the fridge and the pantry and go from there. And my blizzard batch is no exception. It’s chock-full of add-ins: carrots, celery, potatoes, kale, mushrooms, diced tomatoes, and more. I thought it might be fun to share a modular, customizable template for making lentil soup for those times when you don’t want to follow a recipe but do want a little guidance.

Following this template is pretty simple. I’ve divided the ingredients into different sections and indicated how many items from each section you should choose. You can, of course, add more or less depending on what’s in your pantry — this is just a guide. But by sticking to ingredients from each section, you should end up with a hearty, filling soup with diverse textures and flavors. Note that the white wine is highly recommended but not essential. The same goes for most ingredients. Your soup won’t be ruined if you don’t have celery, and the measurements are just suggestions. Be flexible, play with the template, and enjoy.

lentil_soup_template

One-Pot Lentil Soup (a Template)
Serves 4-6

The basics (use all)

  • 1 T olive oil (you can use more if you prefer, or even just water-sauté the mirepoix if you want to avoid added oil)
  • Mirepoix (diced onion, carrot, and celery — the amounts don’t really matter, but aim for about 1/2 cup of each)
  • 3-5 cloves minced garlic
  • Low-sodium vegetable broth (3-4 cups, depending on how soup-y vs. stew-y you want it to be)
  • 1 1/2 cups dried green or brown lentils
  •  1/3 cup dry white wine

The veggies (choose 2-3)

  • 1 cup mushrooms, roughly chopped
  • 2 medium golden potatoes, diced into 1/2” cubes
  • 1-2 cups canned diced tomatoes (use the juice, too)
  • 2 cups kale, roughly chopped
  • 2 cups baby spinach

The additional protein (choose 1)

  • 1/2 cup Beyond Meat chicken, shredded gently
  • 1/2 cup soy curls
  • 1/2 cup vegan beef chunks, chopped if too large
  • 2 vegan sausages, sliced into rounds and cut in half (sautéed ahead of time, if you prefer)
  • 1/2 cup quinoa
  • Additional 1/2 cup lentils

The spices (choose 1 blend or make your own)

  • Basic blend
    • 1 T nutritional yeast
    • 1 tsp cumin
    • 1 tsp paprika (smoked or sweet)
    • 1/2 tsp chili powder
    • Salt and pepper to taste
  • “Beef stew” blend
    • 3/4 tsp cinnamon
    • 1/2 tsp ginger
    • 1/2 tsp nutmeg
    • 1/4 tsp allspice
    • 1/4 tsp cayenne pepper
    • Salt and pepper to taste
  • Curry blend
    • 1 T curry powder
    • 1 tsp garam masala
    • 1 tsp cumin
    • Salt and pepper to taste

To start, heat the olive oil in a large stockpot on medium. When it begins to shimmer, add the mirepoix (onion, carrot, and celery) and garlic. Heat for 3-5 minutes, stirring frequently so nothing burns, until the onion is translucent.

Add your spice blend and give everything a good stir, then add the veggies to the pot UNLESS you’re using kale, spinach, or another green. Hold those till later. Add the lentils (including the additional half cup, if using) and the quinoa, if using. Stir everything again and then add your broth. The broth should cover all your ingredients with about an extra inch of liquid.

Bring everything to a boil, give it a good stir, and then turn it down to low. Let simmer for about 30 minutes, stirring occasionally.

Around the 30 minute mark, add your protein (unless you’re using quinoa or additional lentils) and greens, if using. Add more broth or water, if necessary. Give everything a good stir and cook for another 15 minutes.

After 15 more minutes, check the soup to see if the lentils and potatoes (if using) are soft. At this point, you can also taste for seasonings and adjust accordingly. You could also add more liquid if you want it soupier. Simmer for longer if necessary.

When all ingredients are cooked to your taste, add the white wine. Cook for another 2-3 minutes and then serve.

~~~

What kind of meals do you like to create off the cuff? Would a template for something else be helpful?

Fusion Challenge: Pumpkin Biscuits for Humans and Dogs

VeganMoFo 2015 banner

Day 30: Fusion Challenge!

Oh boy, I am taking some LIBERTIES with this prompt.

Typically, “fusion” food combines elements of two (or more) culinary traditions — like curry burritos or Thai pineapple pizza (!). I’m all for merging the best of the best to create super-delicious meals with bold flavors. I even recipe tested for Joni Marie Newman’s fusion-inspired cookbook, Fusion Food in the Vegan Kitchen. But I’m looking at fusion food from a different lens today… the lens of “combining human and dog food.”

HEAR ME OUT.

Backstory first. Working at The Humane Society of the United States means that I get to bring my dogs to work. We have a strong Pets in the Workplace policy, along with a committee that governs it. It’s a win for humans and dogs alike, in so many ways. But a few weeks ago, we learned that at least one office dog had bordatella, a highly contagious bacterial infection. On the advice of our staff veterinarians, the committee temporarily suspended the PIW policy. For two weeks, our canine companions stayed home, and we humans remembered what it’s like to work somewhere that doesn’t allow dogs. I missed the frequent excuses to get outside, the sound of the occasional bark from somewhere in the building, and the morning rituals when my coworkers (dogs and humans!) greet each other. Of course we all appreciated the caution that prompted the suspension, but it was no fun. And I wished I could explain to Moria and Luna that we weren’t abandoning them at home; they’d be able to return eventually.

Pups

My babies!

Tomorrow, though, the dogs are back! And I couldn’t be more excited. I knew I wanted to bake some dog treats to give out to any pup I see tomorrow, and then I thought… why not make some people treats, too? The ultimate fusion food!

(Am I stretching it? Eh. Too bad.)

Dog and People Biscuits

My strategy was to create a base dough that’s then separated in half and flavored for each species. The human variety has sugar and spices, while the dog variety has oats and extra molasses. Note that although you can definitely eat your canine companion’s biscuits, she shouldn’t eat yours — at least not if you include the nutmeg, which isn’t good for pups. And no, these aren’t the most exciting human biscuits, but I have a secret love for chewy, doughy, mildly flavored things I can snack on!

Ed. note: Okay, this is embarrassing. The human biscuits are… not great… the day after baking, so I can’t really recommend them. Instead, you can double the dog-biscuit ingredients and make a LOT of dog treats, or halve the first set of ingredients. I’m sorry!

Pumpkin Biscuits Two Ways
Makes many tiny biscuits

  • 1 15 oz. can pumpkin puree
  • 1/3 cup coconut oil, softened
  • 1 cup whole wheat flour
  • 1/2 cup wheat germ
  • 1 1/2 T blackstrap molasses
  • 1 T cinnamon

For the human biscuits (not recommended)

  • 1 cup + 1 T all-purpose flour
  • 1/2 cup dark brown sugar
  • 1/4 tsp allspice
  • 1/4 tsp nutmeg
  • 1/8 tsp cloves

For the dog biscuits

  • 1/2 cup all-purpose flour
  • 1 1/2 cup rolled oats

Combine the first set of ingredients in a large bowl, then split the dough and move one half into a new bowl. Preheat the oven to 350˚ and oil two cookie pans.

This second bowl will be your human-biscuit bowl. Add all the human-biscuit (HB) ingredients and mix until well-combined; it will take a few minutes to come together. Refrigerate this dough while you prepare the dog-biscuit (DB) dough. To do that, mix in all the DB ingredients. Refrigerate that dough while you roll out the HB dough.

Roll out he HB dough on a well-floured surface with a rolling pin. Using your favorite cookie cutters, cut the dough into shapes. Repeat the process with the DB dough. If your cookie cutters are vastly different sizes, try to group the small biscuits on a single sheet and the large biscuits on another sheet.

Bake small biscuits for about 15 minutes and larger ones for about 18. They’ll harden as they cool, so don’t worry if they’re soft when they come out of the oven.

~~~

And with that, I say goodbye to Mofo 2015! I’ve been a little burned out this past week, so honestly I’m not sorry it’s over! But I do like the prompts — Steven and I are already musing about ways to incorporate fun/surprise prompts into my blogging practice, and I have some good ideas. Stay tuned!

…and now I’m gonna go eat some roasted potatoes and Gardein tenders. Night, y’all!

Snow Drift/Pantry Challenge

VeganMoFo 2015 banner

Day 26: It’s cold and rainy and there’s a snow drift outside your door! 

Wow, it’s cold and rainy and there’s a snow drift?! That’s some weather. Thanks, climate change! Truly, this prompt is really just a pantry challenge — and y’all know how I love a pantry challenge!

I had to set some ground rules for this prompt, though. Roots Market — one of my favorite local grocers — has been celebrating its “grand reopening” throughout the last week, and they’ve been running some great sales. I headed out to Clarksville to stop by and pick up some goodies, like Califia Farms almond milk (two for $7!) and a few Gardein items (buy one, get one free!), along with a pound of organic almonds (on sale for $5.99/lb!). But I didn’t think it would be fair to include anything I bought today, since I wouldn’t have been able to make it out of the house with that big ol’ cold/rain/snowdrift keeping me in. Instead, I used ingredients I already had to put together a super simple, super comforting kale and yellow split pea soup.

Kale and Yellow Split Pea Soup

Truthfully, I didn’t measure everything I put in this soup. If I were snowbound, I likely wouldn’t be worrying about keeping track of everything! And in a soup like this, the proportions don’t really matter; you can’t go wrong. This particular soup was nice and brothy, with lots of kale. Roughly, here’s what went in:

  • 3 cloves garlic, minced
  • 1 big bag of Tuscan kale (from TJ’s)
  • ~1 cup dried yellow split peas
  • ~6 cups water + concentrated veg broth
  • Lotsa spices (coriander, cumin, onion powder, turmeric)

This is exactly the type of thing I’d make on a snow day! I’d also whip up a loaf of crusty homemade bread — because what could be better than hot straight-out-of-the-oven bread when it’s cold outside?! Today, I used this recipe, because I wasn’t in the mood to knead the dough. I don’t have a Dutch oven, so I cooked it in a cast-iron skillet instead. And I didn’t include any herbs because I wanted a simpler bread. It was so simple and surprisingly good. Again, perfect for a snow day! (Or, y’know, a somewhat cool early fall day. Same thing?)

Kabocha Squash Pizza Sauce

VeganMoFo 2015 banner

Day 22: Make a dish using all seasonal produce.

What a perfect prompt for this autumnal day! I had a big ol’ kabocha squash sitting on my counter, and all day long I mused about how to use it. Simple roasted slices? This beautiful soy-braised preparation? A gingery soup?

And then, on the give-and-take bookshelf at work, I found a copy of Mark Sutton’s Heart Healthy Pizza cookbook up for grabs, and pizza sounded mighty appealing. I’ve seen butternut squash-based cheezy pizza toppings, so why not kabocha?! I decided to make a thick sauce to top a pizza, and it exceeded all my expectations. This sauce is creamy, complex, and perfectly flavored with roasted garlic. And it’s a unique, unexpected way to use kabocha squash!

kabocha

You can prepare the sauce ahead of time, but I did everything in one night. It’s a little time-consuming, but there’s downtime for each component that lets you prep the next component. I included my workflow in the steps below.

Kabocha Squash Pizza Sauce

  • One kabocha squash
  • One head garlic
  • 3/4 cup unsweetened almond milk
  • 2 T nutritional yeast
  • 1 T yellow or white miso
  • 1/2 tsp kosher salt
  • 1/4 tsp cumin
  • A few grinds black pepper

Toppings

  • Basil
  • Caramelized onions

One recipe of your favorite pizza dough

Preheat your oven to 400˚ and pour a little water into a rimmed baking tin. Leaving the rind on, roughly slice the kabocha squash into sixths; don’t worry about how even they are. Place the slices rind-down into the baking dish, drizzle with a little olive oil, and place in the oven. Next, prepare the garlic for roasting. Add the foil packet to the oven and bake both the squash and the garlic for about 45 minutes, or until the squash is fork-tender.

In the meantime, prepare the pizza dough, following your recipe’s instructions. Let it rise while the squash and garlic are in the oven. If you’re topping your pizza with caramelized onions, start caramelizing them now.

When the squash is ready, remove it (and the garlic) from the oven and let them cool for a few minutes while you roll out the pizza dough. Give the dough a brief second rise (after rolling it out) while you prepare the sauce. (If using onions, they should be done by now — just turn off the heat and leave them on the stove until ready to use.)

Preheat the oven to 450˚.

To make the sauce, carefully scoop the squash out of the rinds and add it to a food processor. Squeeze the garlic out of the papery skins into the processor. Be careful here too; it’ll be hot. Add the rest of the sauce ingredients and process until it’s very smooth and creamy.

Spread the sauce as thick as you’d like on the dough. (Save any extra to use with pasta!) Top with caramelized onions and bake for 12 minutes. Remove from the oven, sprinkle with basil, and let cool for about 3 minutes before slicing. Enjoy!

Note: This post contains an affiliate link. If you purchase something through my link, it costs nothing extra for you, but I get a few pennies. I’m not looking to make a fortune, just to cover hosting costs. :)

Spaghetti Squash and Peanut Sauce

VeganMoFo 2015 banner

Day 16: What’s your favorite late summer food?

Forget April — September is the cruelest month. My beloved and most favorite season is coming to an end, and I have to soak up every last bit of sun before the cold sets in. Sigh.

At least there’s late-summer and early-fall produce to comfort me… like squash! Although some smaller squash are at their prime in the height of summer, most larger and more cold-resistant squash peak in the early fall. I think my favorite transition-season squash is the oh-so-fun spaghetti squash. Although I typically serve it with a traditional tomato-based marinara, Steven recently tried it with an unlikely alternative topping: a spicy peanut sauce.

Spaghetti Squash with Peanut Sauce

This is our go-to super-simple peanut sauce. It pairs perfectly with rice noodles, soba noodles… pretty much any noodle! So I shouldn’t have been surprised that it complements spaghetti squash nicely. I simply roasted my squash for about an hour, used a fork to separate the strands, and poured on a big ol’ dollop of sauce. Mmm. Next time you’re looking for a new way to use spaghetti squash, give this a go!

Simple Peanut Sauce
Serves 2-3

  • 1/4 cup natural peanut butter, smooth or chunky
  • 1/4 cup water
  • 1/2 T soy sauce
  • 1-2 tsp sambal oelek
  • 1/2 tsp garlic powder
  • 1/2 tsp sugar (optional — use only if serving with regular noodles; squash is sweet enough!)

In a small bowl, whisk together all ingredients until the sauce is emulsified. That’s it!

What’s your favorite way to eat spaghetti squash?

Note: This post contains affiliate links. If you purchase something through my links, it costs nothing extra for you, but I get a few pennies. I’m not looking to make a fortune, just to cover hosting costs. :)

Caramelized Onion and Broccoli Quiche

VeganMoFo 2015 banner

Day 15: OMG, Barack Obama is coming over because he knows you make awesome vegan food! What are you going to make?

In my most outlandish MoFo fantasy, I bake and decorate an elaborate cake fashioned to look like the GOP elephant symbol. Barack comes over and goes to town on it, a la one of those horrible first-birthday cake smash videos, to show what he thinks of the intransigent Republican congress that’s blocked his every move.

…but that would be a very un-presidential thing to do, so I opted for something a little less partisan.

According to the internet, the president once said his favorite food is broccoli. Okay then! I have my doubts about the veracity of that statement, especially since he said it to a group of elementary school children. He couldn’t very well have admitted that his favorite food was something super-duper unhealthy, right? Regardless of the truth, I decided to incorporate broccoli in my meal. I’m also assuming that Michelle is coming, and I’d want to impress her with a healthy yet delicious vegan meal. Enter quiche!

I hadn’t made a full-sized vegan quiche since Easter 2010. Needless to say, in the past five and a half years, various vegan innovations (vegovations?) have taken egg-replication into bold new frontiers. I was excited to use aquafaba in this quiche, alongside the traditional tofu base. I’m glad I did! It was so creamy and delicious. I opted to make it crustless, because I’m not a huge fan of a traditional pastry crust. Next time, though, I might have to try this hash brown crust (!) from Avocados and Ales. I topped my quiche with grated Follow Your Heart provolone, just because I had a little bit leftover and it was starting to harden. (The provolone, by the way, is surprisingly good! FYH has really stepped up their game.) It was the perfect flavor combination.

Caramelized Onion and Broccoli Quiche

Caramelized Onion and Broccoli Quiche
Serves four

  • One medium yellow onion, sliced into half moons
  • Two small heads broccoli, chopped into small florets
  • 14 oz firm tofu (not vacuum-packed), drained
  • 1/2 cup aquafaba
  • 1/4 cup almond milk
  • 1/4 cup nutritional yeast
  • 2 T cornstarch
  • 1 T soy sauce
  • 1 tsp paprika
  • 1/2 tsp kala namak (black salt)
  • 1/2 tsp garlic powder
  • 1/2 tsp turmeric
  • Salt and pepper to taste
  • 1/4 cup shredded vegan cheese

Add a little oil or vegan butter to a nonstick pan and heat it on medium. Add the onions and a pinch each of sugar, salt, and baking soda. Turn the heat to low and caramelize the onions, stirring them occasionally to prevent burning. They should cook for about 30 minutes. You want them mushy, but still holding their shape a bit.

Preheat the oven to 400˚ while the onions are on the stove. Prepare an 8” cake tin by oiling it liberally.

In the meantime, prepare the quiche mixture by combining the tofu, aquafaba (unwhipped), almond milk, nutritional yeast, cornstarch, soy sauce and spices in a blender or food processor. Blend for at least a minute to whip up the aquafaba.

When the onions are caramelized, move them to one side of the pan and add a splash of water (about 2-3 tablespoons) to deglaze the bottom of the pan. Add the broccoli, turn the heat back up to medium, and cook it for about 5 minutes, just until it softens and turns brighter green. Remove from heat and fold the onions and broccoli into the liquid quiche mixture.

Pour the mixture into the prepared cake pan and sprinkle the vegan cheese on top, if using. Bake for 35 minutes or until the top is golden brown.

Allow to cool for at least 10 minutes before serving.

Caramelized Onion and Broccoli Quiche

I’m confident that Barack, Michelle, Steven, and I would make great dinner party partners. I think we’d steer clear of politics for a while, instead talking about veganism and how healthy, environmentally friendly, and downright delicious it can be.

So, Mr. Obama, when are you coming to dinner?!

Note: This post contains affiliate links. If you purchase something through my links, it costs nothing extra for you, but I get a few pennies to help cover hosting costs. :)