Pumpkin Spice Baked Oatmeal Bars

LVV MoFo 2014 main

I’m writing this post on Thursday night and I’m so very antsy! On Friday afternoon, S and I will be taking off for Rhode Island to meet baby Charlie. I don’t know how I’ll get through the work day tomorrow; I’m so excited! And then we’ll be in the car for eight hours or so… I wish we could fast-forward to the minute I get to wrap my arms around the teeny-tiny newest member of my family. But alas, time marches onward steadily! At least S and I will be armed with snacks galore so we don’t need to make a stop for dinner. He’s picking up fruit and a bag of Earth Balance white cheddar popcorn (SO GOOD), and I’ve made a sweet treat to keep us energized.

Pumpkin Spice Baked Oatmeal Bars

Pumpkin Spice Baked Oatmeal Bars

Makes eight bars

  • 1/4 cup + 2 tablespoons coconut sugar (or brown sugar)
  • 1/4 cup coconut oil
  • 2 tablespoons blackstrap molasses
  • 2 tablespoons agave nectar (or pure maple syrup)
  • 1 teaspoon pure vanilla extract
  • 1 cup pumpkin puree
  • 3 cups rolled oats (I like Bob’s Red Mill Rolled Oats)
  • 1/3 cup wheat germ
  • 1/2 teaspoon cinnamon
  • Scant 1/2 teaspoon salt
  • 1/4 teaspoon allspice
  • 1/4 teaspoon ginger
  • 1/4 teaspoon nutmeg
  • Dash cloves

Preheat the oven to 350˚. Spray an 8″ x 8″ baking pan or line with parchment paper.

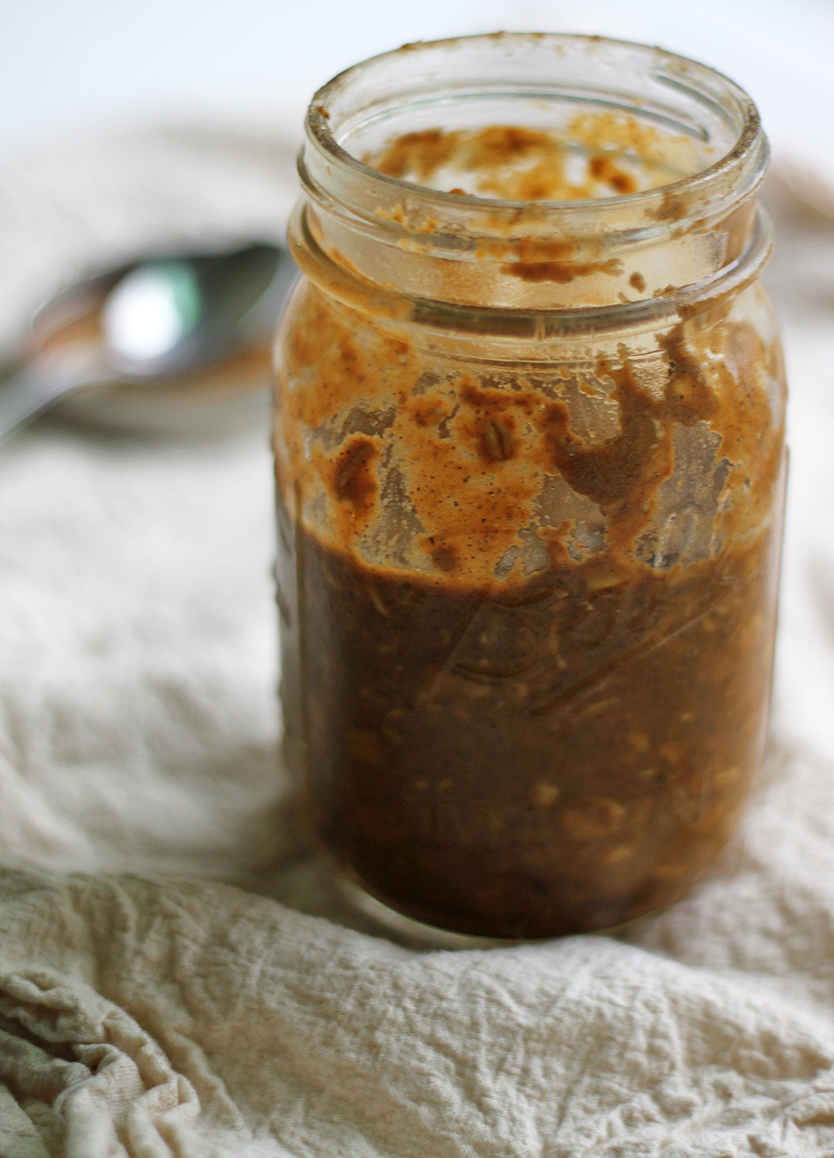
In a small saucepan, heat the coconut sugar, coconut oil, molasses, agave nectar, and vanilla extract over low. Stir to combine as the oil melts. Once all ingredients are well mixed, turn off the heat and stir in the pumpkin puree.

In a large bowl, add all the dry ingredients and mix. Pour in the wet ingredients and stir with a wooden spoon or plastic spatula until the oats are coated and all ingredients are well mixed. Transfer the mixture to the prepared baking pan and press down evenly.

Bake for about 30 minutes until the oats begin to pull away from the sides of the pan. Remove from oven and let cool for at least 10 minutes before slicing with a sharp knife. If you’re patient, let them cool before eating. If not, they might be a little crumbly!

Inspired by this recipe from Two Peas and Their Pod.

Pumpkin Spice Baked Oatmeal Bars

Baked oatmeal bars strike again! I can’t help it; I just love this easy, on-the-go method of enjoying oatmeal. These bars are just sweet enough for me, but if you like a sweeter breakfast, you could substitute maple syrup for the blackstrap molasses. But then, of course, you’d lose out on the stellar benefits of my beloved blackstrap! Each bar gives you 13% of your RDV of iron, about 6 grams of protein, substantial fiber, and nearly your entire day’s requirement of vitamin A. Not a bad way to keep your tummy full on a drive up the east coast!

What are your favorite road trip snacks?

Disclaimer: This post contains affiliate links. If you purchase something through my link, it costs nothing extra for you, but I get a few pennies to help cover hosting costs.

Advertisement

Hot Pumpkin-Molasses Mug

LVV MoFo 2014 main

Real talk part deux: I nearly considered moving my Lazy Sunday posting schtick to today because, um, it’s Friday night and I’ve got things to do. (“Things” being “sitting around in my flannel PJ pants reading Agatha Christie and maybe drinking some wine if things get crazy.”) And then I thought, No, because “Lazy Friday” just sounds stupid. And then I thought, Maybe I can repurpose my Hot Molasses Mug! Blackstrap molasses has tons of calcium, and so does almond milk! And then I thought, No, you lazy fool. Stop being so lazy.

And then I remembered the Kathy Patalsky’s Hot Pumpkin Mug that I made last year for MoFo, and I realized that those mugs needed to meet. Stat.

Hot Pumpkin-Molasses Mug

Hot Pumpkin-Molasses Mug
Serves one

  • 1 cup unsweetened almond milk
  • 2 tablespoons pumpkin puree
  • 1 tablespoon blackstrap molasses
  • 1/2 tablespoon pure maple syrup
  • 1/4 teaspoon ground cinnamon
  • Dash ground nutmeg
  • Dash salt

Blend all ingredients with a standard blender or an immersion blender until well combined. Transfer to a small saucepan and head over medium-low until the mixture begins to steam. Pour into a mug and enjoy.

~~~

I am, admittedly, still pretty lazy, because this recipe is obscenely easy. But holy heck is it good! It’s the perfect blend of two of my favorite flavors, with just a touch of pumpkin pie spices. And—get this—you will get 65% of your recommended daily value of calcium in this mug. 65%! (Well, assuming you use Trader Joe’s Unsweetened Original Almond Milk…) The iron content is not too shabby either at 24%. Guess my laziness paid off this time!

Gingerbread Granola

LVV MoFo 2014 main

S and I were at Whole Foods the other day, trying to stay focused, stick to our shopping list, and ignore the siren’s call of the bulk aisle, when he casually asked me whether I would be making granola again anytime soon. I opted to interpret that as a thinly veiled request and decided it was the perfect opportunity to play with a granola flavor I’d wanted to try for a while: gingerbread.

This granola took two attempts to perfect. I tried to get fancy with the first batch, substituting my beloved raw buckwheat groats for some of the oats, going a bit wild with the spices, and playing fast and loose with the oven temperature. The result was a crumbly, overly ginger-y, and slightly burnt batch. Don’t get me wrong; I still nibbled the crap out of it as I prepared the second batch. And that second batch was much improved.

Gingerbread Granola

Gingerbread Granola
Serves six

  • 1/4 cup coconut oil
  • 3 tablespoons blackstrap molasses
  • 3 tablespoons pure maple syrup or dark brown sugar
  • 2 cups rolled oats (I like Bob’s Red Mill Rolled Oats)
  • 1/4 cup chia seeds
  • 2 tablespoons ground flaxseed
  • 1 heaping teaspoon ground ginger
  • 3/4 teaspoon ground cinnamon
  • Scant 1/2 teaspoon salt
  • 1/4 teaspoon ground cloves
  • 1/4 teaspoon ground nutmeg
  • 1/4 C crystallized ginger, diced

Preheat oven to 300˚ and line a flat baking sheet with parchment paper.

In a small saucepan, add the coconut oil, molasses, and maple syrup or brown sugar. Stir to combine, heating over low so that the oil melts. Once all ingredients are well mixed, turn off the heat and set aside.

In a large mixing bowl, add all the dry ingredients. Pour the wet mixture into the dry ingredients and mix with a large wooden spoon. Once the dry ingredients are thoroughly mixed and coated with the wet ingredients, pour the granola onto the prepared baking sheet and bake for 30-35 minutes, removing from the oven and stirring every ten minutes or so. Remove from the oven and let cool for at least ten minutes before eating.

Note: If you prefer a sweeter granola, feel free to reduce the molasses by a tablespoon.

Gingerbread Granola

Second time’s the charm, I guess! (Although I have to admit that I did slightly burn this batch as well… oy.) I imagine this granola would be fantastic atop a bowl of vanilla soy yogurt—the spicy flavors would play perfectly with the sweet, cool yogurt. Sans yogurt, you’re looking at nearly 17% of your recommended daily value of calcium in a serving, along with 6 grams of protein and 19% of your recommended daily value of iron. Adding a 6-ounce carton of soy yogurt will increase your calcium intake by about 30% of your RDV, depending on the brand. Take that, Whole Foods.

Disclaimer: This post contains affiliate links. If you purchase something through my link, it costs nothing extra for you, but I get a few pennies to help cover hosting costs.

Pumpkin Overnight Oats (and a brief disquisition on calcium needs)

LVV MoFo 2014 mainMany of us think of essential nutrients in relatively simple terms: protein is for your muscles, iron is for your blood, and calcium is for your bones. Though the full story is obviously more complex, it’s not a bad summary in the case of calcium. 99% of the calcium in your body is stored in and used by your teeth and bones, and this is the calcium that’s affected by your diet. The other 1%, called serum calcium, is stored in your blood and isn’t affected by diet. (1) So for our purposes, we won’t concern ourselves with the 1% (insert your favorite wealthy-person joke here).

The other 99% of our bodily calcium takes on the crucial job of keeping our bones and teeth firm and strong. Throughout our lives, our bones actually remodel themselves frequently, taking up calcium and using it to form new bone-bits. (1) That’s why we can’t just stop worrying about our calcium when we “stop” growing—our bones actually don’t stop changing. They need constant sources of dietary calcium to perform that vital work. When we don’t get enough calcium, we’re at risk for osteopenia—a thinning of bone density. (2) Left unaddressed, osteopenia can lead to full-blown osteoporosis (“porous bone”). Folks with osteoporosis have significantly less bone density than they should, and they’re at an increased risk of bone fractures. (3)

As most of us know, postmenopausal women are one of the most at-risk groups for this disease. That’s because decreases in estrogen production during menopause reduce calcium absorption and increase bone resorption (the actual process by which your body breaks down calcium stored in bone and releases it into the blood). (1) But just being female puts you at an increased risk for osteoporosis, as does being caucasian, having a small body size, and being physically inactive. It’s important for children—especially girls—to reach their peak bone mass before adulthood, because having a high bone mass as a young adult is a solid indicator that you’ll retain that bone mass throughout your life. (3)

So, now to the million-dollar question(s): What should one eat to obtain maximum calcium? And how much calcium do we need, exactly? The NIH’s recommendations are a great place to start. As a non-pregnant, non-lactating female between 19 and 50, I need 1,000 mg a day. Where can I find those milligrams? Well, I can get 400 mg in just two tablespoons of my BFF blackstrap molasses. A cup of collard greens has 357 mg. Four ounces of tofu processed with calcium sulfate can offer anywhere between 200 and 400 mg. Various beans, greens, and calcium-fortified non-dairy products are also great places to start. There are a few factors that affect calcium absorption, however:

  • Vitamin D (whether food- or sun-derived) improves calcium absorption. (1)
  • Phytic acid and oxalic acid, which occur naturally in some plants (e.g. spinach) can inhibit calcium absorption. (1)
  • A high-protein diet can increase calcium excretion, but recent research indicates that simultaneous processes actually improve absorption, so the effects could cancel one another out. (1)

Whew! That’s a lot to think about. Let’s get to some food now.

Horizontal view of a small mason jar filled with a thick dark orange oat mixture.

Pumpkin Overnight Oats
Serves one

1/2 C + 1 T nondairy milk
1/3 C pumpkin puree
1 T blackstrap molasses (you can add more if you’re a fan like I am)
1 T pure maple syrup
1/2 tsp cinnamon (I actually prefer closer to 1 tsp, but again, that’s just me!)
Dash nutmeg
1/2 C rolled oats

In a mason jar or other container with a tight lid, combine all ingredients except the oats. Shake vigorously until well-combined. Add the oats and shake again. Place in fridge and cool overnight.

Diehard readers might recognize this recipe from last year’s MoFo. I have to share it again, though, because it’s a great source of calcium! One jar gives you at least 30% of your daily value (more if you load up on the blackstrap molasses). That’s a great way to start your day.

Sources cited:

(1) http://ods.od.nih.gov/factsheets/Calcium-HealthProfessional/
(2) http://www.spineuniverse.com/conditions/osteoporosis/osteopenia-osteoporosis-there-difference
(3) http://www.cdc.gov/nutrition/everyone/basics/vitamins/calcium.html

Note:

I’m neither a doctor nor a dietitian; please don’t treat my posts as medical advice! Consult a medical practitioner for specific medical or nutritional recommendations.

BBQ Baked Black-Eyed Peas

LVV MoFo 2014 main

Every family has staple dishes that make an appearance without fail on specific special occasions. S’s mom always makes creamy, buttery, onion-y mashed potatoes for Thanksgiving. Christmas wouldn’t be Christmas without date balls from my aunt. And a backyard cookout would have seemed empty without a big pot of baked beans during the summers of my childhood.

This take on baked beans is a divergence from the recipe I grew up eating. Iron-rich black-eyed peas stand in for the more traditional legumes, and a thick barbecue sauce lends tang. I highly recommend using the tempeh bacon bits, but they’re not strictly necessary.

BBQ Baked Black-Eyed Peas

BBQ Baked Black-Eyed Peas
Serves four

For the tempeh bacon bits:

  • 1/2 package tempeh, crumbled into pieces about 1/2″ thick
  • 2 T low-sodium soy sauce, tamari, or coconut aminos
  • 1 T maple syrup
  • 1/2 tsp liquid smoke
  • 1 T canola or vegetable oil + 1/2 T maple syrup (for cooking)

Combine soy sauce, maple syrup, and liquid smoke in a container with an airtight lid. Add tempeh bits, close the container, and shake until all tempeh bits are coated in the marinade. Let sit for at least 30 minutes and up to 24 hours. (If you’re cooking your black-eyed peas from scratch instead of using canned, let the tempeh marinate while the peas cook.)

For the baked black-eyed peas:

  • 4 cups cooked black-eyed peas (if using canned, rinse very thoroughly; if cooking from scratch, reserve the cooking liquid)
  • 5 cloves garlic, minced
  • 1 small yellow onion, diced
  • 6 oz. tomato paste
  • 1 1/2-2 C reserved cooking liquid or water
  • 2 T blackstrap molasses
  • 2 T maple syrup
  • 1 T prepared yellow mustard
  • 1 T vegan worcestershire sauce
  • 1 T apple cider vinegar
  • 2 tsp chili powder
  • 1/4 tsp allspice

Preheat the oven to 350˚.

In a small pan, heat the tablespoon of canola oil. Add the garlic and sauté for about 30 seconds, then add the diced onion. Sauté for another 5 minutes until the onion starts to become translucent. Add the crumbled marinated tempeh (marinade and all) to the pan. Cook for another 7-10 minutes, stirring frequently, or until the tempeh is browned and a bit caramelized. Turn off the heat and set aside.

In an 8-cup glass baking dish, whisk together the remaining ingredients (tomato paste through allspice). Add the black-eyed peas and stir into the sauce mixture, coating all the peas. If necessary, add additional cooking liquid/water to the sauce. Cover with aluminum foil and bake for 40 minutes, then uncover and bake for another 15-20 minutes.

Note: If you don’t have tomato paste, you could probably substitute a 15 oz. can of plain tomato sauce and reduce the amount of cooking liquid/water you use.

BBQ Baked Black-Eyed Peas

Black-eyed peas, tomato paste, and our old friend blackstrap molasses are all chock-full of iron—each serving of this dish offers 29% of the recommended daily value. (Most ingredient lists don’t measure iron in grams, so I’ll be going by percentages from here on out.) And you’ll also get 28% of your daily value of calcium, along with 7.5 grams of protein and whole lot of potassium. Not bad for a cookout dish!

What staple dishes does your family serve? 

Hot Molasses Mug (and a brief disquisition on iron needs)

LVV MoFo 2014 main

If you’re a woman and you’ve ever gone through a spell of exhaustion, chances are you’ve gotten the “Maybe you’re anemic!” suggestion from a concerned friend or family member. Although anemia is technically a lack of hemoglobin in the blood, the term tends to be used colloquially for an iron deficiency. (1)

So—why can an iron deficiency make you tired, both mentally and physically? In over-simplified terms, it’s because iron is an “essential component of hemoglobin,” a protein that carries oxygen from your lungs to your tissues… tissues like your brain and muscles. (2) In truth, it’s actually rare for people in developed countries to have a serious iron deficiency; it’s more common in the developing world. Most of us get enough iron from our diets. However, pregnant women are often encouraged to take iron supplements because their bodies require more iron—it takes a lot of red blood cells (which carry hemoglobin) to feed the fetus and placenta. (2)

One complication for us vegans stems from the difference between heme and non-heme iron sources. Heme iron comes from animal sources and is absorbed more efficiently than non-heme iron, which comes from plants. Therefore, you technically should consume more iron if you’re vegan. However, you can increase non-heme iron absorption by eating foods containing vitamin C at the same meal—and many iron-rich foods are also naturally high in vitamin C. (1) And the good news is that as far as we can tell, vegetarians don’t have greater incidences of iron-deficiency anemia than meat-eaters. (3)

The CDC’s recommended daily allowances (RDA) for iron vary by age and sex, and it’s good to have a sense of how much you need. As a 27-year-old ciswoman, I need 18 mg according to the CDC. However, the Vegetarian Resource Group notes that vegetarians could require up to 1.8 times more iron than omnivores. (3) That’s about 32 mg for me.

Luckily for us, non-heme iron is not hard to find. One cup of lentils has 6.6 mg. An ounce of pumpkin seeds has 4.2 mg. One cup of cooked fresh spinach has 6.4. And blackstrap molasses—that unassuming viscous liquid!—has a whopping 7 mg in just two tablespoons.

Blackstrap molasses, as it turns out, makes an excellent hot beverage when whisked with hot almond milk. (Thanks for the inspiration, Pinterest!) Beats taking it by straight by the spoonful, as I’ve been known to do.

Hot Molasses Mug

Hot Molasses Mug
Serves one

  • 1 cup almond milk (or other nondairy milk of choice)
  • 2 T blackstrap molasses
  • Dash pure vanilla extract

In a small saucepan over low-medium heat, warm the almond milk until it begins steaming. Transfer to a mug and add the molasses and vanilla extract. Whisk vigorously until combined. Enjoy.

Hot Molasses Mug

With one warming beverage that could barely be any easier to prepare, I’ve got nearly a third of my iron requirement fulfilled. And—bonus!—I’ve found my new favorite fall beverage.

How do you take your molasses?

Sources cited:

(1) http://www.cdc.gov/nutrition/everyone/basics/vitamins/iron.html
(2) http://ods.od.nih.gov/factsheets/Iron-HealthProfessional/
(3) http://www.vrg.org/nutrition/iron.php

Note:

I’m neither a doctor nor a dietitian; please don’t treat my posts as medical advice! Consult a medical practitioner for specific medical or nutritional recommendations.

Pumpkin Overnight Oats

When I wake up in the morning, my list of immediate tasks to complete is short: Use the potty, shower, feed and walk Moria. Notably absent from that list? Eating breakfast. I just can’t eat first thing in the morning; I need at least an hour for my stomach to settle. I’ve always been this way, meaning that my “breakfast” during high school was usually a bagel or something I could wolf down during homeroom, since I sure as hell wasn’t going to get up early enough to eat at home. Sometimes I didn’t eat breakfast at all.

These days, I never miss breakfast. I usually eat during my first hour or so at work. I like to keep cereal at my desk and almond milk in the fridge, but I often bring something else—muffins, fruit, whatever’s lying around. I’m also a big fan of oatmeal, particularly overnight oats.

If you’re unfamiliar with the concept, it’s beautifully simple. You soak rolled oats and your add-ins of choice in nondairy milk overnight, and they’re ready to eat the next morning. The taste and texture are notably different from cooked oatmeal;  overnight oats are less porridge-y because the oats retain their individual shape better. You also eat them cold. I was wary at first, but I adore them now.

For the past couple days, I’ve been loving this intensely flavorful, pumpkin-based oat concoction. A heaping spoonful of blackstrap molasses adds iron and calcium (not to mention a rich, deep sweetness), while pumpkin gives you Vitamin A galore. Add a big shake of cinnamon and you’re ready to start your day off right!

Vegan pumpkin overnight oats // govegga.com

Pumpkin Overnight Oats
Serves one

  • 1/2 C + 1 T nondairy milk
  • 1/3 C pumpkin puree
  • 1 T blackstrap molasses (you can add more if you’re a fan like I am)
  • 1 T pure maple syrup
  • 1/2 tsp cinnamon (I actually prefer closer to 1 tsp, but again, that’s just me!)
  • Dash nutmeg
  • 1/2 C rolled oats (I use Bob’s Red Mill Rolled Oats)

In a mason jar or other container with a tight lid, combine all ingredients except the oats. Shake vigorously until well-combined. Add the oats and shake again. Place in fridge and cool overnight.

What’s your favorite make-ahead breakfast? What kind of overnight oats do you enjoy?

Note: This post contains affiliate links. If you purchase something through my link, it costs nothing extra for you, but I get a few pennies to help cover hosting costs.