Muffins on Monday

VeganMoFo 2015 banner

Day 14: Share something vegan (and delicious, duh!) with a non-vegan. 

I am infinitely fortunate to work with lots and lots of vegans. (I guess that’s what happens when you work in the animal protection field!) But not all of my coworkers are vegan or vegetarian, so I figured this prompt was the perfect opportunity to serve up some vegan treats to the masses, veg and non-veg alike. And what better time than during a Monday morning meeting?

LPS Muffins

Representatives from every section of our department attend a daily 10:00 AM meeting to discuss new and ongoing projects, so today I brought a container of mini lemon poppy seed muffins to share. I think this is one of my absolute favorite muffin flavors! I found this particular recipe on the aquafaba group Facebook page and knew I had to try it. With a whole tablespoon of baking powder and six tablespoons of aquafaba, these little muffins were super light and airy. My only complaint was the lack of lemon flavor; although they look gorgeously lemon-hued, they don’t have the characteristic tang I want in a lemony baked good. Next time I make them, I’ll add lots more lemon juice.

Everybody was so pleased at this surprise Monday-morning treat that I might have to start bringing in baked goods more often!

Kitchen Tour!

VeganMoFo 2015 banner

Day 13: It’s kitchen tour time!

Steven and I consider ourselves lucky. In the notoriously expensive Montgomery County housing market, we snagged a low-priced rental when we moved here two years ago. We rent a condo, and our landlord is responsive, friendly, and fair — he hasn’t raised our rent the two times we’ve re-signed the lease. And we have a great kitchen!

Ktichen Panorama

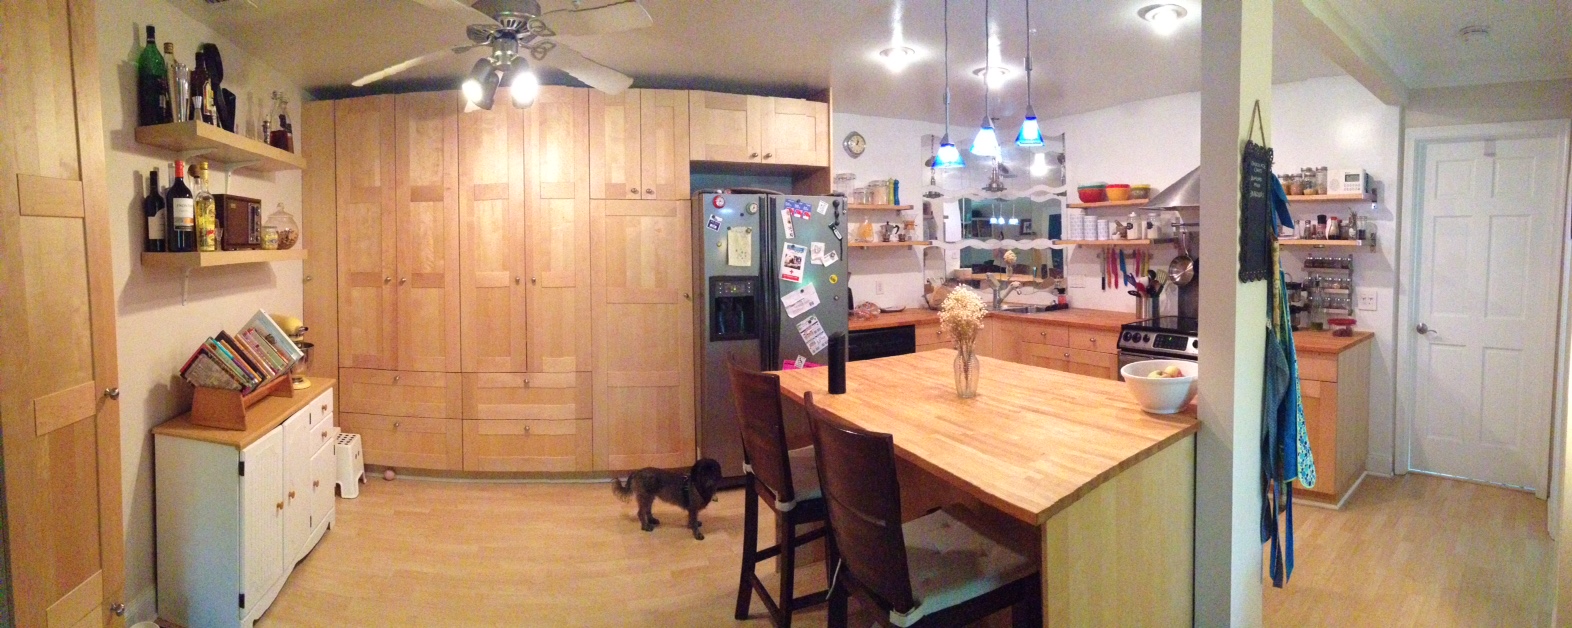
Many of the units in our complex have a small kitchen and a small dining room, but ours has an open floor plan — you can see where the wall used to be in the photo below. We’ve got a huge island/eating area, and a massive amount of storage. See that big wall of cabinets? We have a coat closet, pantry, and all our dishes in there! And there’s Moria wondering what I’m doing.

I’ll start at the left in the panorama photo.

kitchen9

My favorite part of my kitchen! We got this little piece for $5 at a yard sale — what a steal. Inside is our recycling bin and some random stuff.

kitchen1

This radio doesn’t work, but it’s so pretty.

kitchen7

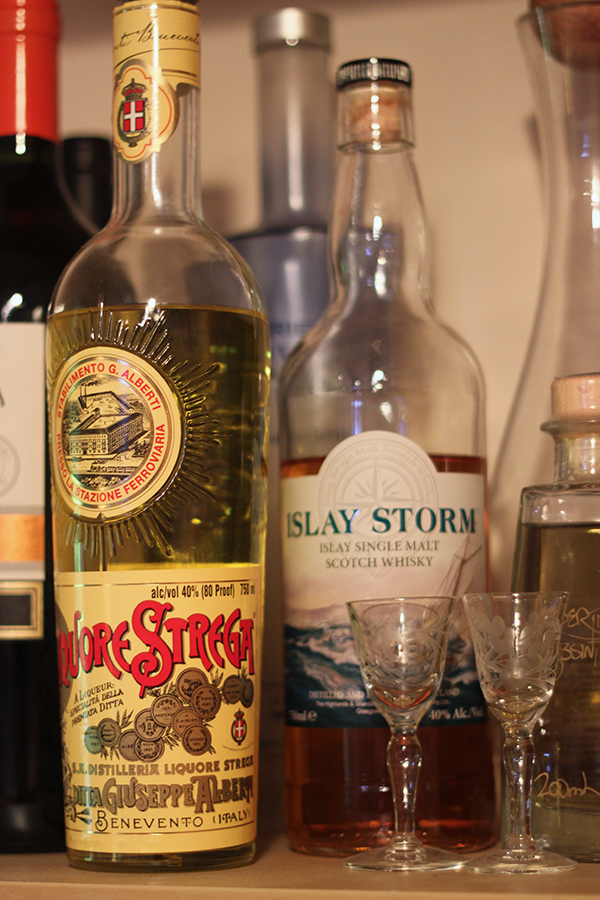
Steven’s mom gave me those darling aperitif glasses; they’re from her side of the family. And I love the design on the Strega bottle.

kitchen6

The other side of that shelf houses our spoils from Honeydukes (!) and a jar of doggie treats. I love the jar — Steven found it on the “free table” at work.

kitchen8

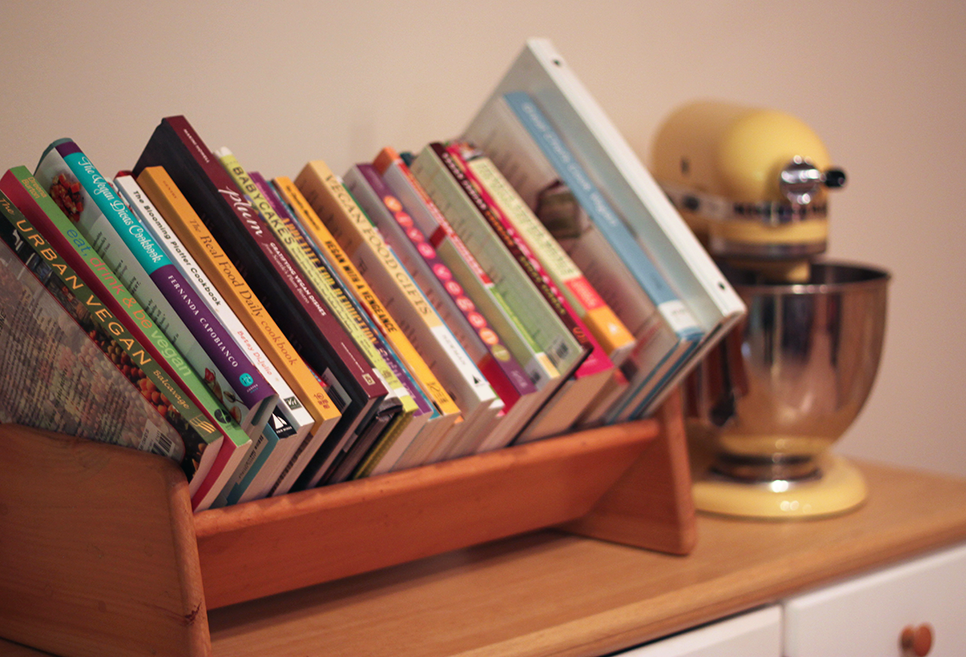
My cookbooks and my KitchenAid — two essentials! My grandfather was an avid woodworker, and he made that little bookholder. I use it as a benchmark for my cookbook collection — if it starts overflowing, it’s time to donate a few items to the free table!

kitchen5

To the right of the fridge is a set of shelves where we keep some pantry staples and all our coffee- and tea-making implements! There are whole beans in the red tin, and coffee from Café du Monde too. My friend gave that to us as a thank-you for watching her pup. We use a Baratza grinder (bottom left), and it’s fantastic. Between that and the Chemex, you can make a great cup of coffee. I like to use the Moka pot when I want a smaller serving.

kitchen2

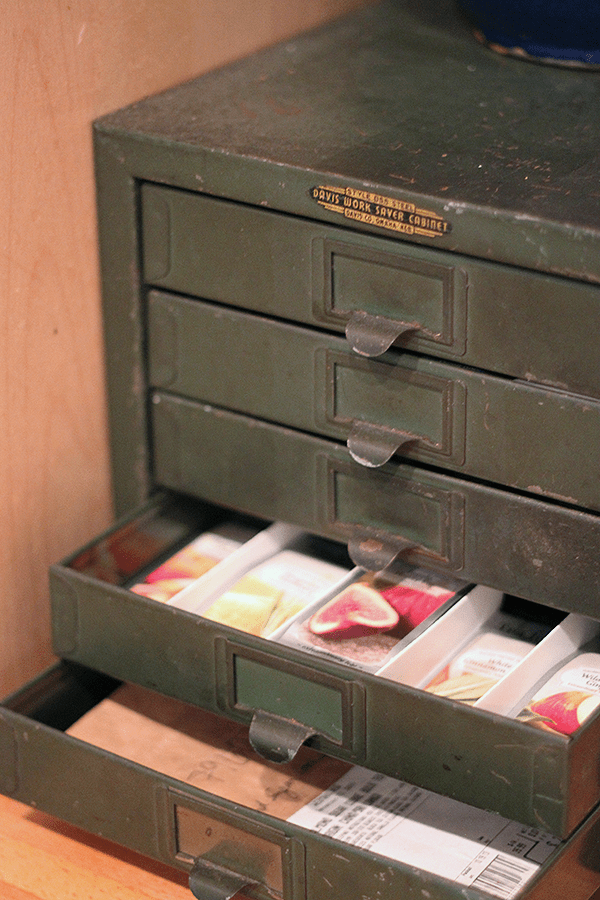
This piece belonged to Steven’s grandfather, who was a tailor. He stored his buttons in it! Now it houses our tea collection. :)

kitchen3

To the right of the sink is [some of] my beloved Pyrex collection (the little blue bowl is in the drying rack!), along with more pantry staples and our knives. You can see the butcher block counters, too. I don’t love them, especially near the sink where they get wet easily. They’re fine for the island, but impractical for most everywhere else.

kitchen4

To the right of the sink are more dry goods, spices, a few condiments, a scale, and the radio — because you have to listen to NPR while cooking or cleaning!

There you go! A short tour of my current* kitchen. I can’t wait to see yours!

*Steven and I are house-hunting! AHH!

My Favorite Cookbook: The Homemade Vegan Pantry

VeganMoFo 2015 banner

Day 12: Tell us about your favourite cookbook!

I’ve been waiting for this prompt all month just so I can rave about Miyoko Schinner’s The Homemade Vegan Pantry: The Art of Making Your Own Staples! When the book was published and I began reading reviews, I knew I needed it on my shelf. And then, serendipitously, Steven’s mom gave it to him as a birthday gift in August! Needless to say, I quickly appropriated it for my own. (To Steven’s benefit, of course, since he reaps the rewards of my pantry staple-making!) How do I love this book? Let me count the ways.

  1. The design. This is a beautiful cookbook. The layout and photography make me salivate, and not just because all the food is so good. The homey, down-to-earth styling is a perfect fit for the topic of this book. I love the subdued color palette, too.
  2. The concept. I’ve always been enamored with the idea of a home-grown and homemade pantry. Making one’s own staples is budget-friendly, eco-friendly, and downright fun-friendly! Although not everyone might agree, I find it enormously rewarding. Miyoko takes this concept and makes it accessible, which is crucial. The vegan diet is often viewed as one of privilege, and the [arguably unnecessary] act of making one’s own staples smacks of too much empty time and too much money to spend on “weird” ingredients. But Miyoko starts with the basics and builds on them, and for the most part, her recipes don’t require expensive or “weird” ingredients. (With a few exceptions — fermented tofu liquid, I’m lookin’ at you!) She takes pains to make these recipes simple and doable, hitting back at the notion that only obsessive foodies would have the time or the inclination to make basics like soymilk and mustard.
  3. The recipes. The design and the concept would mean nothing if the recipes didn’t stand on their own. Happily, they do!

Schinner Pantry TOC

Truthfully, I’ve only skimmed the surface of the recipes. I have grand dreams of cooking my way through the book, though. And, importantly, just reading through this book has given me more confidence to try my hand at pantry staples I’ve avoided in the past. Here’s what I’ve made so far.

  • Almond Milk, p. 54 (and my own Simple Vanilla Oat Milk)
  • Unpork, p. 116
  • Classic Pancake and Biscuit Mix, p. 158
  • Biscuits from said mix (they were amazing!)
  • Sausage Spice, p. 125
  • Blueberry jam, inspired by her easy cheat method

…okay, it’s a short list. But everything has been excellent. The Unpork is incredibly easy to whip up. It’s just another take on seitan, but the pulling and stretching method gives it a stringiness reminiscent of pork. That evocative name — Unpork, very much not pork — is a great reminder of why I’m vegan. I Instagrammed this photo right after I made it.

Unpork Instagram

I met that big ol’ piggy at Poplar Spring Animal Sanctuary during their open house last month. A total sweetie!

The recipe yields a fair amount, so I immediately froze six big pieces. A few weeks later, I used them to make a BBQ “pulled pork” sandwich. It was so easy! I just thawed them a bit, sliced it very thin, and heated it up with some BBQ sauce. Yum yum!

BBQ Unpork

I love this cookbook so much that I’ve been known to take it to bed with me, just to flip through it before going to sleep. I’ve taken it on car rides, just to have something to look at. I can’t get enough of it! And I’m excited to start stocking my pantry with even more homemade staples.

If you have this book, what are your favorite recipes?

Note: This post contains affiliate links. If you purchase something through my link, it costs nothing extra for you, but I get a few pennies. I’m not looking to make a fortune, just to cover hosting costs. :)

Soft-Batch Tahini Snickerdoodles

VeganMoFo 2015 banner

Day 11: Focus on a nutrient

Today’s prompt was my theme for last year’s VeganMoFo! I focused on the nutrients that omnivores enjoy grilling us vegans about, like protein, calcium, and iron. I’ve got a lot of great, nutrient-rich recipes in that tag, so you should check ’em out!

So given my near-expertise (heh) in matters of vegan nutrition, would it surprise you that I’m sharing a cookie recipe today? It shouldn’t! As I learned last year when I investigated protein and where to get it, my conclusion was that protein is in lots of unexpected places. Like cookies. Especially cookies made with chickpeas and tahini! Enter these dreamy soft-batch Tahini Snickerdoodles. With 4 grams of protein per cookie, they’re a modest but not insubstantial source of natural protein. Each cookie also contains 2 grams of fiber, and since the RDV is 15 grams, you can fulfill nearly 1/3 your daily requirement just by eating two cookies! :D

If you’re worried about putting chickpeas in cookies, here’s what Steven said when I told him about this unexpected ingredient: “Really?! Holy sh*t! You can’t taste it at all!” And Steven is quite discriminating when it comes to “healthy” ingredients in desserts.

Soft-Batch Tahini Snickerdoodles

Soft-Batch Tahini Snickerdoodles
Makes 16 cookies

  • 1 can (15 oz) chickpeas, shelled/skinned if you’re so inclined (save the liquid!)
  • 1/3 cup tahini
  • 1/4 aquafaba (chickpea liquid), whisked briskly for 30 seconds or shaken in an airtight jar for 10 seconds
  • 1/4 cup pure maple syrup or agave nectar
  • 2 T melted coconut oil
  • 2 T brown sugar
  • 1 tsp pure vanilla extract
  • 1 1/2 cup all-purpose flour
  • 1 T ground cinnamon
  • 2 tsp baking powder
  • 1/2 tsp salt

For rolling

  • 1 1/2 T white or turbinado sugar
  • 1/2 T ground cinnamon
  • 1 T sesame seeds, white or black

Preheat the oven to 350˚F.  Prepare a cookie pan by oiling it or lining it with parchment paper.

Using a blender, combine the chickpeas, tahini, aquafaba, liquid sweetener, coconut oil, brown sugar, and vanilla extract. Blend for about 30 seconds or until everything is smooth.

Add the remaining dry ingredients (excluding the rolling sugar) to a mixing bowl and stir to combine. Pour in the wet ingredients and use a wooden spoon or plastic spatula to mix. The dough will be very thick, so use that elbow grease to get it all incorporated.

Next, stir the rolling sugar mixture together in a small bowl. Use your hands to roll 1 1/2 to 2 tablespoon balls of dough, then roll them in the sugar. Flatten them slightly and place them on the prepared baking sheet.

Bake for 14 minutes and allow to cool for 5 minutes before eating.

Notes

  • I’ve become a chickpea-skinning convert. It makes hummus SO much creamier, since the chickpeas are more easily blended without those pesky skins. So now I always skin my chickpeas. It takes a few extra minutes, but it’s an oddly satisfying feeling to have those little skins slip right off in your fingers.
  • Aquafaba! Have you tried it? It’s probably not strictly necessary in this recipe, but it provides a great texture.
  • These are not particularly sweet cookies, so if you have a bigger sweet tooth than I do, add a few tablespoons more brown sugar.

Something Blue: Vintage Pyrex

VeganMoFo 2015 banner

Day 10: Something blue

Ugh! These last few prompts have made me grumpy, especially this one. Blueberries are the obvious choice, but nobody’s going to want to post about them, and we’re all going to try to come up with something super unique. SIGH.

Well, I guess I’m no different, because I didn’t want to share a blueberry recipe either! When I think about the color blue in the context of my kitchen, I immediately think of Pyrex. I’m a lover of vintage Pyrex in general, but my two favorite pieces just happen to be blue! The first is this absolutely beautiful turquoise butterprint mixing bowl.

Butterprint Pyrex

Butterprint is my favorite pattern, and that turquoise is such a sweet shade! I’ve seriously considered getting that butterprint rooster as a tattoo. Not sure if I’d do it in turquoise, though.

My second-favorite piece of Pyrex is this simple blue bowl, the smallest of the four pieces in the primary color mixing bowl set.

Blue Small Pyrex

I guess I’m a sucker for blue, because this shade just melts my heart! It’s so warm and peaceful. And I love how the blue fades into that beautiful almost translucent milk glass. This is my favorite bowl to use for snacks or noodles or, well, anything! I’m 100% in favor of using my Pyrex regularly, not letting it languish on the shelf. In fact, I keep my Pyrex bowls on display, but there are usually a couple of bowls missing because they’re in the drying rack!

Finally, this Pyrex-inspired print from Pocono Modern is my favorite piece of kitchen art. And it just happens to have a blue background!

Pyrex Art

Yay for blue!

Retro Recipe: Mustard!

VeganMoFo 2015 banner

Day 9: Most retro recipe.

During my senior year of high school, we celebrated Spirit Week, with days where seniors were encouraged to dress in various costumes. One theme was ’80s Day. My silly friends and I always had to be just a little different (read: weird), and decided that since the administration hadn’t specified WHICH ’80s they meant, it was open to interpretation. So when the rest of the senior class showed up to school in leggings and neon with teased hair, we were in silver and black and shiny things… because we were from the 2080s. We thought we were oh so clever.

You can probably see where I’m going with this.

Today’s prompt — Most Retro Recipe — got me thinking. Just how retro could I go?! Then last night, I came across this Food52 article about the history of mustard and immediately knew just how retro I would go. Guess when the first written recipe for mustard appeared? Not the 1500s or 1600s, as Steven and our friend Lara guessed when I posed the question. Nope, you have to go all the way back to 42 AD! Doesn’t that just blow your mind?! After learning just how retro mustard is, I went down a Google rabbit hole of mustard research and only surfaced for air to share some truly amazing mustard-inspired scribblings with Steven and Lara, such as this poem-recipe for mustard:

For lumbardus mustard
Take mustarde and let hit drye
Anonyn, Sir, wyturlye;
Stomper hit in a morter fyne,
And fars hit thurghe a clothe of lyne;
Do wyne therto and venegur gode,
Sturm hom wele togeder for the rode,
And make hit thyke inowghe thenne,
Whenne thou hit spendes byfore gode menne,
And make hit thynne with wyne, I say,
With diverse metes thou serve hit may.

— from Liber cure Cocorum, c. 1480

Be still, my Middle-English-loving heart! This cookbook written in verse is now my new favorite thing, and I want to cook everything from it.

But one thing at a time! Further research into historical mustard-making techniques revealed that ancient Roman mustard usually contained other nuts ground up with the mustard seeds, and that black mustard seeds were more commonly used than yellow. Intrigued, I decided to tweak the recipe a bit to come up with my own not-so-ancient Roman mustard… because the ancient Romans certainly didn’t have food processors.

Ancient Roman-Inspired Mustard
Makes way too much mustard

  • 1/2 cup black mustard seeds
  • 1/2 cup pine nuts
  • Scant 1/4 cup red wine vinegar
  • 1/2 cup water
  • 1 tsp salt

Using a mortar and pestle, grind the mustard seeds for about a minute. They should remain mostly whole. I had to grind the seeds in batches because they didn’t all fit in my mortar.

Add the ground seeds to a food processor, along with the pine nuts. Process for about thirty seconds, then add the remaining ingredients and process into a paste.

Transfer to a jar and refrigerate for 24 hours before serving.

Roman Mustard

As you can see, this mustard looks… well, different from regular ol’ mustard! It hasn’t rested its full 24 hours yet, so I haven’t tried it in its final form. I’ll be sure to report back. ;)


New-to-Me MoFo Bloggers!

VeganMoFo 2015 banner

Day 8: Reach out! Make a new vegan friend & tell us about it.

Whoa, you want me to make a friend in a single day?! That’s crazy talk. Despite my bloggerly loquaciousness, I’m not one to make fast friends. My friendships are more of a slow burn, if you will.

That said, in the eight days of MoFo so far, I’ve encountered a few new-to-me blogs (and bloggers!) that I’ve particularly been enjoying. Here are a few highlights:

I’ve always loved the way Vegan MoFo encourages bloggers to reach out and find new reads, so I love that there’s a prompt devoted to those relationships. In my life — both on- and offline! — I’m lucky to have many dear friends who share my ethics and ideals, and I cherish their company. I can’t imagine how isolating it would be if I didn’t have these relationships to sustain me. If you’re a vegan without a strong support network, don’t be afraid to reach out! My contact info is here if you want to chat. <3

Sweet Iced Oat Milk

VeganMoFo 2015 banner

Day 7: Make/eat something inspired by a book or film.

Today’s prompt is terrifyingly broad! On this hot Labor Day Monday, when I’m still tired out from last night’s fundraiser and post-fundraiser friend times, all I want is to drink ice-cold water and snack on healthy foods. As I perused the internet looking for inspiration, I came across this quote from A Game of Thrones:

“…Wine no longer agrees with my digestion, I fear, but I can offer you a cup of iced milk, sweetened with honey. I find it most refreshing in this heat.” (Grand Maester Pycelle to Ned Stark, p. 250)

As a fan of the book series, the idea of making something super-simple yet inspired by a King’s Landing drink appealed to me. Ned describes the milk as “oversweet to his taste,” so I made sure not to go overboard with the sweetener in my version. I think this one would be Eddard-approved!

Sweet Iced Oat Milk

Sweet Iced Oat Milk
Serves 2-3

  • 1 cup rolled oats
  • 3 cups filtered water
  • 2 1/2 T pure maple syrup
  • Dash cinnamon

Add the dry oats to the blender and pulse for 20-30 seconds, or until they’re in small pieces. Add the water and let soak for about 10 minutes, giving the oats a stir now and then if you think of it. Blend for 2-3 minutes, or until you don’t see any pieces. (Give your blender a little rest in between minutes if it’s not particularly strong.)

Place a nut milk bag over a large measuring bowl or mason jar and pour the oat milk through the bag. Use your hands to gently squeeze out the milk, but most of it should strain very quickly. Set the bag aside. Pour the milk back into the blender and add the maple syrup and a dash of cinnamon. Blend for 10-15 seconds, then return to a jar for storing.

If you have time, freeze a few ice cubes made of the oat milk. To serve, add 2-3 cubes to a frosty glass, then pour in the milk. If you’re short on time, you can place the entire container of milk in the freezer for about 15 minutes so it gets very cold, and forgo the ice cubes. No matter which way you serve it, be sure to give it a quick whisk or stir to recombine any separated ingredients.

Oat milk should last for about a week in your fridge.

Sweet Iced Oat Milk

Spicy Thai Eggplant (a not-recipe)

VeganMoFo 2015 banner

Day 6: Re-create a restaurant meal.

I am not impressed with today’s prompt. You want me to make a restaurant-quality meal… on a Sunday?! I might not be religious, but Sunday is my day of rest. Sure, I might spend a few hours in the kitchen making big-batch food to freeze or use in lunches, but it is decidedly not my day of recipe experimentation. Plus, today is a special Sunday. A good friend is hosting a fundraiser for Second Chance Wildlife Center at a local winery tonight, and I’ve got to bake a couple cakes to bring. Hmm… so much for that day of rest.

Which is all a big long preamble to explain why I’m cheating on today’s MoFo post. Instead of actually re-creating a dish, I’m telling you how I would do it. But I’m not actually doing it. Because ain’t nobody got time for that. And by “nobody,” I mean me. And by “time,” I mean the inclination to shower, dress in real clothes, and run to the Asian market in between baking my Bundt cakes and finalizing my contribution for tonight’s silent auction, then come home and experiment with a dish I’ve never made before, then photograph it, then upload the photos, then edit them, then post about the whole shebang. Nope. Not happening.

If I did have the time and the inclination, though, I’d re-create my current favorite Thai dish: the generically named spicy Thai eggplant. It’s become my go-to order at Thai Tanium, a local eatery that’s a favorite among my mostly vegan coworkers. I love how the chunks of eggplant break apart and become almost creamy. I love the Thai basil, a bright note among a heavier base. I love it all! If I were making my own spicy eggplant, I would start with these:

Purple Pixie Eggplants

These locally grown Purple Pixies are perhaps the most beautiful vegetables I’ve ever purchased. When I saw them at Wegmans, I couldn’t pass them up! They are tiny, perfect, and I don’t know if I’ll be able to eat them. (Just kidding; I will.)

If I were using them in a Thai eggplant dish, I’d stop by the Asian market and pick up some black bean sauce. I’d also look for vegan fish sauce, but if they didn’t have it, I’d probably make my own. I’d check for Thai basil, but my homegrown regular ol’ basil would work just fine in a pinch. I would base the recipe on this one, but I’d take some notes from this recipe, especially for the sauce. I wouldn’t deep-fry the eggplant, though, and I might add some tofu for added protein. I’d serve it with brown rice, and it would be delicious.

Purple Pixie Eggplant

Apologies for the cop-out — I don’t intend to cheat on any more prompts this month!

My Favorite Sandwich + a Savory Marinated Tofu Recipe

VeganMoFo 2015 banner

Day 5: Best sandwich ever.

I love and hate today’s prompt. Love, because a good sandwich can be sublime. When quality bread meets fresh veggies, a savory protein, and a spreadable fat, beautiful things happen. Hate, because best ever?! How am I supposed to decide? I haven’t tasted all the sandwiches! It’s too much pressure! I can’t do it!

What I can do, however, is share my absolute favorite go-to sandwich, the one I make when I have a little prep time. It doesn’t sound like much more than a glorified TLT, but the flavor profile is totally different thanks to sauerkraut and Dijon mustard. This “recipe” is also flexible; you can modify it based on whatever veggies and toppings you have in the house. Just make sure to include the marinated tofu!

Marinated Tofu Sandwich

Here’s what you’ll need:

  • Quality bread. Homemade is great, but today I’m using Trader Joe’s sourdough pane. I usually prefer a grainier bread, but this is what I have!
  • Spread. Vegan mayonnaise and a good Dijon mustard work perfectly here. Don’t use anything with too much unique flavor, like pesto.
  • Sauerkraut. It adds such a perfect tang!
  • Sprouts. I used home-sprouted mung beans. You don’t need anything fancy; these were only sprouted for a day! I use a Handy Pantry stacking sprout garden and love it, but you can go old-school with a jar and cheesecloth.
  • Marinated Sandwich Tofu. See below! You can make this in advance and use it cold, or eat it hot off the pan. Mmm.
  • Veggies. Sliced fresh tomatoes and a few pieces of lettuce are my go-to. I’ll also add some avocado if I have it!

Marinated Tofu Sandwich

Marinated Sandwich Tofu

Serves two to three

  • 1 block extra-firm tofu (14-16 oz), pressed for at least an hour (if you have time)
  • 2 T low-sodium soy sauce or tamari
  • Scant 1/2 T vegan Worcestershire sauce
  • 1 tsp toasted sesame oil
  • 1/2 tsp hot sauce like Frank’s (optional)
  • 1/2 tsp maple syrup or maple sugar
  • 1/2 tsp garlic powder
  • Dash liquid smoke (more if you’re particularly fond of the flavor)

In a large container with an airtight lid, whisk together all the marinate ingredients (everything except the tofu). It might not look like much marinade, but it’s enough!

Prep your pressed tofu by laying it down on a cutting board and cutting it in half. Turn those two halves on their sides and slice them into four wide slices each, for a total of eight large slices.

Using a fork, poke a few shallow holes in each slab of tofu. Don’t poke too deeply; you’re not trying to go all the way through. You just want to create a few more nooks and crannies for the marinade to penetrate.

One slice of tofu at a time, place each side of the tofu in the marinade so all sides are coated. Depending on the size of your container, you might have enough room for all the tofus to lay flat. If not, you can stack them once they’re coated on each side. Cover the container and refrigerate it.

Marinate for at least 30 minutes, gently flipping the container over halfway through.

When you’re ready to cook the tofu, heat a little vegetable or olive oil in a heavy pan on low-medium heat — I like to use cast iron — and cook as many tofus as fit comfortably at a time. Don’t overcrowd it, though, or you’ll break a tofu! Cook for about 4 minutes on either side, but you can cook for longer if you want a crispy crust.

To assemble the sandwich, toast two slices of bread per sandwich very lightly. Spread liberally with mustard, mayo, or whatever spread you’re using. Place two slices of tofu on one slice of bread and a pile of sauerkraut on the other, being sure to let the sauerkraut drain for a second before adding it so the sandwich isn’t too watery. Then pile on the other ingredients, smoosh together, slice in half, and get your nom on!