Pumpkin Spice Affogato

I brainstormed lots of ways to introduce this post, but you know what? Sometimes words fail. So—a photo.

Pumpkin Spice Affogato

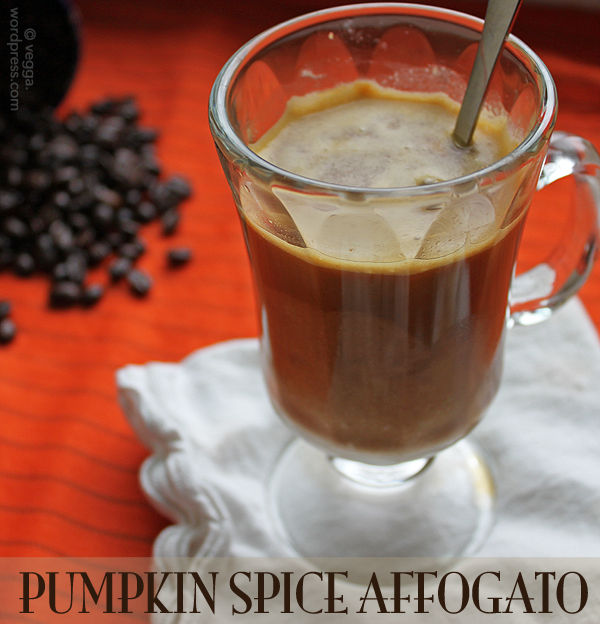
Ah. Sometimes, photos fail. Sometimes, the vision you have in your head of what a Pumpkin Spice Affogato will look like doesn’t match the reality, because (1) there’s not much of a contrast between pumpkin-colored ice cream and dark coffee, and (2) not having a tripod means you have to ask your significant other to pour the coffee so you can catch a mid-stream shot, and sometimes your significant other accidentally spills it, and sometimes you lose your temper and very unfairly blame him, and in the time it takes for you to talk it over and apologize, the sun starts setting and you lose the light. So sometimes, you have to ask your readers to use their imaginations, and you have to ask them for forgiveness for the lackluster photos. (And you have to ask your significant other’s forgiveness for snapping at him.)

Just pretend you can see two perfectly round scoops of deep orange pumpkin spice ice cream, with a stream of hot coffee coming down from an unseen pouring device, just starting to melt the top scoop of ice cream. Then, another shot—melty, foamy, frothy ice cream and coffee blending into one puddly mess. Affogato, baby.

Do I need to back up? Not sure what affogato is? Let me enlighten you. Literally meaning “drowned” in Italian, affogato in culinary terms is a scoop of ice cream (typically vanilla) topped with a shot of espresso. Something magical happens with the hot coffee hits the ice cream, producing a frothy, hot-and-cold, sweet-and-bitter, opposites-attract mug of superlative yumminess. I like to make it with a shot of amaretto, and I’ve had a version at Great Sage that included the most chocolate-y chocolate stout I’ve ever tasted—that particular affogato was very nearly a meal in itself.

Now that we’re all on the same affogato-appreciating page, let’s talk about this pumpkin version. Such a simple idea, and pretty darn simple to execute, too. A couple scoops of pumpkin ice cream are all you need to transform the traditional dessert into something any coffee-loving fan of pumpkin spice flavors can appreciate. If you don’t have an espresso maker (alas, I don’t), strongly brewed hot coffee works nearly as well.

Of course, there are dozens and dozens of pumpkin ice cream recipes out there, and the recipe I dreamt up turned out to be very similar to one the ever-inspiring Hannah Kaminsky posted four years ago, right down to the addition of bourbon. So I can’t call my pumpkin ice cream recipe 100% original, but I did make some changes to Hannah’s recipe, reducing the sugar and changing the spice profile just a bit. But you don’t have to use my recipe in your affogato; feel free to choose from any of the plentiful pumpkin ice cream recipes out there.

Pumpkin Spice Ice Cream
Adapted from Hannah Kaminsky’s recipe

  • 1 14-oz can full-fat coconut milk
  • 1 15-oz can pumpkin puree
  • 1/2 cup coconut sugar
  • 2 tablespoons dark brown sugar (or more coconut sugar)
  • 1/4 cup maple syrup
  • 2 tablespoons bourbon
  • 1 1/2 teaspoons ground cinnamon
  • 3/4 teaspoon ground ginger
  • 1/4 teaspoon ground cloves
  • 1/4 teaspoon salt
  • Dash ground nutmeg

Mix all ingredients in a large bowl and whisk briskly until all ingredients are well incorporated and the mixture is smooth. Chill for 10 minutes if necessary, then transfer to your ice cream maker and process following the manufacturer’s instructions. Once it’s reached the consistency of your choice, transfer to another container and freeze until ready to use.

Pumpkin Spice Affogato
Serves one

  • 2 small scoops pumpkin spice ice cream
  • 2 shots of espresso or strongly brewed coffee

Place the scoops of ice cream in a heat-safe glass mug. Pour your freshly made espresso or coffee over the ice cream. Eat without delay.

How do you feel about affogato?

Three-Bean Millet Chili

Certain dishes are tied to very specific times in my life. Brown rice with pesto? College, eating at the dining hall, not caring for any of the veg options, and making a meal from the a la carte items. Celeste frozen pizzas? Kindergarten and the first few years of elementary school, when my mom ran an in-home daycare and would occasionally let us sit on blankets in the basement eating pizza and watching Star Wars. Popcorn with loads of different topping options? My first year in Madison, when my roommate Kristina and I would set up a “popcorn bar” and watch countless episodes of The Office.

Some dishes, though, are constants, growing up right along with me. My mom has made apple crisp with fresh-picked apples every autumn I can remember, only now she uses Earth Balance instead of butter. And my dad has always, always been able to whip up a mean batch of chili. It was kind of his thing when we were young; everyone knew Mitch would bring a delicious spicy chili to family parties. These days, he foregoes the ground beef and makes them plant-based instead. (I’m told he made a killer mushroom-based faux-meat filling this summer, but I didn’t get to try it!)

When S and I started dating, S wasn’t quite as facile in the kitchen as I was (not to mention that he ate meat at that point!). But he could do one thing I couldn’t: he could make a kick-ass chili. Once when my parents visited me in Madison, I made chili for lunch, but it was watery, bland, and generally an embarrassment compared to the chilis my dad makes. He very diplomatically did not call out my subpar chili-making abilities, but I felt ashamed nonetheless. So the next time S made chili, I watched him and learned his secrets for making a thick, filling chili: Don’t add water or vegetable broth. Use tomato paste. Add a little brown sugar or molasses. Brilliant. My chilis have never been the same.

And of course, once you know the rules, you can break them! This three-bean chili totally ignores the no-water rule, but only because the addition of uncooked millet necessitates adding a little more liquid for the millet to soak up as it cooks. You could, of course, eschew the millet and its attendant water and go for a more traditional chili. But then you’d lose out on the 21 grams of protein and hefty dose of iron that the 3/4 cup of millet adds to this dish… and you’d lose out on a unique spin on traditional chili.

Three-Bean Millet Chili

Three-Bean Millet Chili
Serves eight

  • 1 tablespoon olive oil
  • 3 large cloves garlic, minced
  • 1 red or yellow onion, diced (reserve about 1/4 cup for serving)
  • 1 poblano pepper, de-seeded and diced
  • 1 green bell pepper, diced (reserve about 1/4 cup for serving)
  • 1 teaspoon chili powder (or more, depending on your tastes)
  • 1 teaspoon salt
  • 3/4 teaspoon Mexican oregano (but you can probably use regular oregano just fine)
  • 1/4 teaspoon red pepper flakes
  • Dash allspice
  • 1/2 cup roasted red peppers, chopped
  • 6 oz tomato paste
  • 3 15-oz cans diced tomatoes (fire-roasted if you have ’em!)
  • 15 oz water
  • 2 tablespoons strong brewed coffee (optional but recommended)
  • 1 tablespoon dark brown sugar or coconut sugar
  • 3/4 cup dried millet
  • 15 oz dark red kidney beans
  • 15 oz pinto beans
  • 15 oz black beans
  • Salt and pepper to taste
  • Scallions for serving (optional)

Heat the olive oil in a large stockpot over medium-low. Add the onion and garlic and sauté for about 5 minutes, then add the two diced peppers. Cook for another 5 minutes, then add the spices. Stir to coat the vegetables, then mix in the roasted red peppers and the tomato paste. Add the diced tomatoes, water, coffee (if using), sugar, and millet and turn up to medium heat. Bring to a low boil and cook for about 20 minutes or until the millet is soft. Add the beans and simmer for another 15 minutes with the cover off to help any excess liquid evaporate. Like most chilis, this one benefits from as much simmering time as you can give it!

When you’re ready to serve, top each bowl with a sprinkle of diced onions, green peppers, and sliced scallions.

~~~

When S tried his first bite, he exclaimed, “Mmm, this is good!” Dad, I think even you’d approve of this one!

What’s your favorite chili recipe?

Note: This post contains an affiliate link. If you purchase something through my link, it costs nothing extra for you, but I get a few pennies.

Pumpkin Quinoa Muffins

Ah, weekends. I truly enjoy my job, but I still relish the no-obligations charm of the weekend. With a few exceptions, this Saturday morning was top of the charts. Reading, coffee, toast, cool autumn air, yesterday’s Diane Rehm show, the scent of pumpkin muffins in the oven… what’s not to love? (Cleaning Luna’s mucus-puke off the sofa, but let’s not get into that.)

I don’t know about you, but when I cook a pot of grains, I always make extra. Brown rice, quinoa, whatever—it’s a sure thing that we’ll use it up, whether it’s in a lazy lunch like a burrito bowl or a slightly more time-consuming meal like Sweet Potato and Red Lentil Soup. So when I prepped the quinoa for last week’s Nutty Quinoa-Stuffed Delicata Squash, I made extra. Instead of incorporating it into a savory dinner dish, though, I decided to try putting quinoa into muffins. And I’m really glad I did. I love the slightly nutty taste and the not-quite-crunchy texture it adds, not to mention the nutrition boost!

Pumpkin Quinoa Muffins

Pumpkin Quinoa Muffins
Makes 12 muffins

  • 1 1/2 cups unbleached all-purpose flour
  • 1/3 cup wheat germ (or more flour)
  • 1 teaspoon baking powder
  • 1/2 teaspoon ground cinnamon
  • 1/2 teaspoon ground ginger
  • 1/2 teaspoon salt
  • 1/4 teaspoon baking soda
  • 1/4 teaspoon ground nutmeg
  • Dash cloves
  • 1 cup unsweetened almond milk
  • 2/3 cup pumpkin puree
  • Heaping 1/3 cup granulated sugar or coconut sugar
  • 2 tablespoons dark brown sugar (or more regular sugar)
  • 2 tablespoons melted coconut oil (or vegetable/canola oil)
  • 1 teaspoon pure vanilla extract
  • 1 cup cooked and cooled quinoa

Preheat the oven to 350˚ and prepare a dozen-muffin tin using liners or a light spray of oil.

In a large mixing bowl, sift together the flour, baking powder, baking soda, salt, and spices. Stir in the wheat germ, if using.

In a small bowl, whisk together the wet ingredients (not including the quinoa) and the sugar(s) until well combined. Make a well in the center of the dry ingredients and add the wet. Using a plastic spatula or a wooden spoon, stir gently to combine, but don’t over-mix. Fold in the quinoa, then add the batter to the prepared muffin tin with a spoon. Fill each well about 3/4 full. Bake for 22-25 minutes, or until a toothpick inserted in the center of a muffin comes out clean. Remove from oven and let cool for a few minutes before eating.

~~~

Fair warning: If you have a major sweet tooth, you might want to add more coconut or brown sugar to these babies. Although my younger self would probably recoil in disgust at this development, I find myself less drawn to sugary-sweet baked goods these days. (With a few notable exceptions!) Especially when those baked goods might well constitute my breakfast. So these muffins, which are spicy and quinoa-y and not so sweet, are my perfect fall breakfast snack. I think they could only be more perfect if I’d used spelt or whole-wheat pastry flour, but alas—we have neither in the house right now, and S took the car this morning, and I was too lazy to walk over to the grocery store. Ah, Saturday.

What’s your ideal Saturday breakfast? What else should I put quinoa in?!

Note: This post contains an affiliate link. If you purchase something through my link, it costs nothing extra for you, but I get a few pennies. I’m not looking to make a fortune, just to cover hosting costs. :)

Nutty Quinoa-Stuffed Delicata Squash

LVV MoFo 2014 main

On the drive home from work this evening, S asked me what I was planning to make for the last day of Vegan MoFo.

“Something with that Delicata squash that’s been sitting around for a week,” I said. “Maybe stuffed squash. Any ideas?”

He barely had to think about the question before answering.

“Nuts! And dried cranberries!”

Nuts and dried cranberries it is. For the last day of September, I put together a dinner that’s pretty to look at and fun to eat. Quinoa gets an autumnal makeover as the filling for the melt-in-your-mouth Delicata squash, and the spice combo evokes all the best fall flavors. A hint of cinnamon and maple syrup adds a touch of sweetness, and the toasted nuts provide a little crunch. The filling would make an excellent gluten-free Thanksgiving stuffing alternative on its own! As written, though, this recipe is a surprisingly satisfying and filling dinner.

Nutty Quinoa-Stuffed Delicata Squash

Nutty Quinoa-Stuffed Delicata Squash
Serves two

  • 1/2-1 tablespoon Earth Balance
  • 1/4 cup red onion, diced
  • 1/4 cup celery, diced
  • 1/2 teaspoon dried sage
  • 1/4 teaspoon dried parsley
  • 1/4 teaspoon dried thyme
  • 1/4 teaspoon salt
  • A couple grinds of fresh pepper
  • Dash cinnamon
  • 1/2 tablespoon maple syrup
  • 1/2 cup chopped toasted nuts (I used a mix of hazelnuts and walnuts)
  • 2 tablespoons unsweetened dried cranberries
  • 1 1/2 cup cooked quinoa
  • 1 Delicata squash, split lengthwise, with the seeds and stringy bits scooped out
  • A little extra Earth Balance or coconut oil

Preheat the oven to 425˚ and fill an 8″ x 8″ (or 9″ x 9″, depending on the size of your squash) baking pan with a thin layer of water.

Melt the Earth Balance in a small pan over medium-low heat. Add the onion and celery and cook for about 5 minutes until they start to soften. Add the spices and maple syrup and stir so that the onion and celery are coated. Cook for another 3 minutes or so, then remove from heat.

In a large bowl, mix together the quinoa, toasted nuts, dried cranberries, and the onion and celery mixture. Scoop into the cored Delicata squash and pack tightly. The filling can come up over the edge a little bit, but not too far. You’ll have extra, but that’s okay. Dot the filling with a little coconut oil or Earth Balance. Place the squash halves in the prepared pan, add the remaining filling to a small baking dish, and place on the middle rack of the oven. Bake for 30 minutes or until the Delicata squash is browned on top and is pierced easily with a fork. Remove from oven and let cool for a few minutes before eating. Drizzle with a little extra maple syrup if you’re feeling indulgent!

Nutty Quinoa-Stuffed Delicata Squash

Besides being my favorite squash for its ease of preparation (you can eat the skin, so no need to remove it!) and its creamy texture, Delicata is rich in vitamin A and vitamin C. Quinoa, of course, is a phenomenally healthy little seed, and it’s really what gives this dish its nutritional punch. One serving (one filled half squash) provides 24 grams of protein, 41% of your RDV of iron, and 11% of your RDV of calcium. That’s a pretty darn strong finish to my “Where do you get your protein?!” month, wouldn’t you say?

And what a month it’s been! I’ve really enjoyed myself. Sure, I had a few lazy days, but overall I’m proud of the recipes I created and the consistency with which I was able to put them together. And, for the first time in a while, I’m feeling inspired to keep creating recipes and to continue blogging. Hold me to it if I don’t!

And with that, I bid this year’s Vegan Month of Food a truly fond farewell.

What’s your favorite squash? If you participated in Vegan MoFo, how did it go?

Pumpkin Spice Baked Oatmeal Bars

LVV MoFo 2014 main

I’m writing this post on Thursday night and I’m so very antsy! On Friday afternoon, S and I will be taking off for Rhode Island to meet baby Charlie. I don’t know how I’ll get through the work day tomorrow; I’m so excited! And then we’ll be in the car for eight hours or so… I wish we could fast-forward to the minute I get to wrap my arms around the teeny-tiny newest member of my family. But alas, time marches onward steadily! At least S and I will be armed with snacks galore so we don’t need to make a stop for dinner. He’s picking up fruit and a bag of Earth Balance white cheddar popcorn (SO GOOD), and I’ve made a sweet treat to keep us energized.

Pumpkin Spice Baked Oatmeal Bars

Pumpkin Spice Baked Oatmeal Bars

Makes eight bars

  • 1/4 cup + 2 tablespoons coconut sugar (or brown sugar)
  • 1/4 cup coconut oil
  • 2 tablespoons blackstrap molasses
  • 2 tablespoons agave nectar (or pure maple syrup)
  • 1 teaspoon pure vanilla extract
  • 1 cup pumpkin puree
  • 3 cups rolled oats (I like Bob’s Red Mill Rolled Oats)
  • 1/3 cup wheat germ
  • 1/2 teaspoon cinnamon
  • Scant 1/2 teaspoon salt
  • 1/4 teaspoon allspice
  • 1/4 teaspoon ginger
  • 1/4 teaspoon nutmeg
  • Dash cloves

Preheat the oven to 350˚. Spray an 8″ x 8″ baking pan or line with parchment paper.

In a small saucepan, heat the coconut sugar, coconut oil, molasses, agave nectar, and vanilla extract over low. Stir to combine as the oil melts. Once all ingredients are well mixed, turn off the heat and stir in the pumpkin puree.

In a large bowl, add all the dry ingredients and mix. Pour in the wet ingredients and stir with a wooden spoon or plastic spatula until the oats are coated and all ingredients are well mixed. Transfer the mixture to the prepared baking pan and press down evenly.

Bake for about 30 minutes until the oats begin to pull away from the sides of the pan. Remove from oven and let cool for at least 10 minutes before slicing with a sharp knife. If you’re patient, let them cool before eating. If not, they might be a little crumbly!

Inspired by this recipe from Two Peas and Their Pod.

Pumpkin Spice Baked Oatmeal Bars

Baked oatmeal bars strike again! I can’t help it; I just love this easy, on-the-go method of enjoying oatmeal. These bars are just sweet enough for me, but if you like a sweeter breakfast, you could substitute maple syrup for the blackstrap molasses. But then, of course, you’d lose out on the stellar benefits of my beloved blackstrap! Each bar gives you 13% of your RDV of iron, about 6 grams of protein, substantial fiber, and nearly your entire day’s requirement of vitamin A. Not a bad way to keep your tummy full on a drive up the east coast!

What are your favorite road trip snacks?

Disclaimer: This post contains affiliate links. If you purchase something through my link, it costs nothing extra for you, but I get a few pennies to help cover hosting costs.

Kale and White Bean Soup

LVV MoFo 2014 main

Years and years before kale was thrust into the spotlight by foodies in search of the next food superstar, my mama started making a kale soup that my entire family loved. I thought of that soup today, the first chilly day of the year, and knew I needed to make it. Kale soup, of course, is nothing new, and I do feel silly posting a recipe for something that’s as simple as simple can be. But if you have yet to discover the combination of kale and white beans, this soup is for you.

Kale and White Bean Soup

Kale and White Bean Soup
Serves six

  • 1 tablespoon olive oil
  • 3 cloves garlic, minced
  • 1/2 yellow onion, diced
  • 3 stalks celery, diced
  • 2 medium-sized carrots, diced
  • 3 medium-sized yellow potatoes, diced (about 1/4″ cubes)
  • 1 teaspoon chili powder
  • 1 teaspoon smoked Spanish paprika
  • 3/4 teaspoon cumin
  • 1/2 teaspoon dried oregano
  • 1/4 teaspoon coriander
  • Dash cloves
  • 4 cups low-sodium vegetable broth
  • 10-12 oz. curly kale, de-stemmed and torn into small pieces
  • 2 cups navy beans (or other white beans)
  • 4-5 cups water (or additional vegetable broth)
  • Salt and freshly ground black pepper to taste

Heat the olive oil in a large stockpot over medium-low heat and add the garlic. Sauté for about 30 seconds, then add the onion, celery, and carrots. Cook for about 5 minutes, or until the onion is translucent. Add the potatoes and spices and give everything a big stir. Add the vegetable broth and turn up the heat to medium. Bring the soup to a boil, then reduce heat to low and simmer for 15-20 minutes or until the potatoes are soft. Add the water or additional broth Add a big scoop of kale and stir it in; after it wilts a bit, add another big scoop. Repeat until you’ve added all the kale. (Or you can just add it all in at once if your stockpot is big enough!). Add the beans and cook for another 10-15 minutes or until the kale is as tender as you like it. Add salt and pepper to taste and serve!

Kale and White Bean Soup

My version of Mom’s kale soup uses a spice blend similar to that you’d find in chorizo, giving it a smoky, spicy flavor. But you can switch up the spices based your tastes. Like most soups, this one is endlessly versatile. You can also add and remove many of the ancillary ingredients. No celery? No problem. Feel like adding some bulk? Throw in some orzo or quinoa. In a rush? Use Trader Joe’s bagged kale; just pull off the larger stem bits. You could even reduce the spices and add some soyrizo.

Mom’s kale soup is, unsurprisingly, ridiculously healthy. A serving gives you 17 grams of protein, 18% of your recommended daily value of calcium, and 29% of your RDV of iron. You’ll also get lots of vitamin A and vitamin C. Thanks, Mom!

What’s your favorite soup?

Breakfast Recipes of MoFos Past

LVV MoFo 2014 main

Good morning! Today we’ll visit MoFos of years past, revisiting some favorite breakfast recipes and evaluating their nutritional stats to see how they stack up. Why no new recipe on this last Wednesday of MoFo? Well, as I write this post, it’s Tuesday evening, and I did not get much sleep last night. My sister, you see, was giving birth to her second child, my second nephew. I was on the couch with my iPad and my phone by my side, trying to read and waiting for news. Happily, everything went easily and little Charlie made a smooth entrance to the world. S and I will be driving up on Friday to meet him. I can’t wait.

Today, though—recipes! Of yore!

Almost top-down view of a square of baked oatmeal on a small white plate with two Medjool dates. In the background is a mug of coffee.

Okay, so this Banana Bread Baked Oatmeal wasn’t technically a MoFo post. Oops. But it’s delicious and pretty darn good for you, with 8 grams of protein, 25% of your RDV of iron, 13% of your RDV of calcium, and substantial fiber. Hey-ho, hearty breakfast!

Bright blue cloth with a white plate and a stack of seven thin, orange pumpkin pancakes. Scattered around them are a few mini chocolate chips.

I forgot how pretty these Pumpkin-Chocolate Chip Pancakes are! And with 17% of your RDV of iron, 8% of your RDV of calcium, 5 grams of protein, and a whole lot of vitamin A in a quarter of the batch, they’re also pretty good for you!

Nearly top-down image of a mason jar filled with chunky oatmeal, with lots of visible little apple pieces.

No joke, these Apple Pie Overnight Oats are my most popular recipe on Pinterest! And they couldn’t be easier. This single-serving recipe provides 6 grams of protein, 14% of your RDV of iron, and 17% of your RDV of calcium. And it tastes like pie. So… there’s that.

And now I want breakfast.

What’s your favorite breakfast recipe?

Note: Nutritional stats are calculated using Trader Joe’s Unsweetened Original Almond Milk.

Mocha Teff Muffins

LVV MoFo 2014 main

Last year for Christmas, my parents put bags of teff flour in the kids’ stockings. (Has that sentence ever been written before?!) I’d ask a leading question like, “What do you think it says about us that we were thrilled?” but I suspect many of my readers would be equally excited to receive a new ingredient as a present! I loved everything about this gift, from the thought behind it to the product’s packaging.

Truth be told, though, I haven’t used it till now. I wanted to do it justice, y’know? I figured I should make injera, but I wanted to do that only if I were making a big Ethiopian feast, and that just hasn’t happened yet. But as I rummaged through my pantry in search of nutritional superstars in disguise, I noticed that a quarter cup of teff flour has 20% of your daily value of iron, 8% of our RDV of calcium, 24% of your RDV of iron, and a cool 5 grams of protein. Needless to say, I had to try it, and I wondered how it would fare in a baked good. The answer? Really, really well.

Mocha Teff Muffins Mocha Teff Muffins
Makes 12 muffins

  • 3/4 cup teff flour
  • 1 cup unbleached all-purpose flour
  • 1/4 cup cocoa powder (Dutch-processed, ideally)
  • 1 teaspoon baking powder
  • 1/2 teaspoon salt
  • 1/4 teaspoon baking soda
  • Dash ground cinnamon
  • 1/3 cup rolled oats
  • 1 cup cold very strong coffee (feel free to make it using instant espresso powder)
  • 1/3 cup almond milk
  • 1/3 cup vegan sugar
  • 1 tablespoon dark brown sugar (or additional regular sugar)
  • 1/4 cup canola or vegetable oil
  • 1 teaspoon pure vanilla extract
  • 1/3-1/2 cup chocolate chips

Preheat the oven to 350˚ and prepare a muffin tin using liners or a light spray of oil.

In a large mixing bowl, sift together the first seven dry ingredients (teff flour through cinnamon). Stir to combine, then add the oats. In a small bowl, whisk together the wet ingredients and the sugar. Make a well in the center of the dry ingredients and add the wet. Using a plastic spatula or a wooden spoon, stir gently to combine, but don’t overmix. The batter will be very smooth, almost silky. Fold in the chocolate chips, then add the batter to the prepared muffin tin with a spoon. Fill each well about 3/4 of the way. Bake for 15-17 minutes, or until a toothpick inserted in the center of a muffin comes out clean. Remove from oven and let cool for at least five minutes before eating.

Mocha Teff Muffins

I’m enchanted with teff flour! The grain itself is teeny-tiny, and the flour is incredibly fine. It makes a silky-smooth batter that mixes with nearly no trouble, and the baked muffin has a light, delicate crumb. I’m itching to bake with it again already!

And the nutritional stats of these not-too-sweet muffins? If you eat two (and you will), you’ll get 22% of your RDV of iron, 7% of your RDV of calcium, about 7 grams of protein, and a respectable helping of fiber.

Have you cooked with teff flour?

Butternut Squash Risotto with Sage and Toasted Hazelnuts

LVV MoFo 2014 main

We’ve all got a favorite flavor pairing. Peanut butter and chocolate. Raspberries and chocolate. Coffee and chocolate. Wait, how did chocolate make its way into all those examples?! Oops. How about mango and cardamom? Pumpkin and cinnamon? And my sleeper favorite, butternut squash and sage. There’s something transcendent about that combination, but I don’t use it often enough. Every time I do, though, I’m reminded how lovely sage is—it has such a pure, clean scent, and it complements butternut squash like a dream. I think you’ll agree when you try this dish.

Butternut Squash Risotto with Sage and Toasted Hazelnuts

Butternut Squash Risotto with Sage and Toasted Hazelnuts
Serves four

  • 1/2 small yellow onion, diced
  • 1 tablespoon olive oil
  • 1 1/2 cups arborio rice
  • 1/2 cup dry white wine (we keep a bottle of cheap wine in the fridge for cooking)
  • 4-6 cups low-sodium vegetable broth
  • 1 1/2 cup roasted butternut squash, mashed or pureed (you can roast a squash in advance and keep it in the fridge, then just scoop out the insides)
  • 2 tablespoons nutritional yeast
  • 1 teaspoon dried sage (fresh sage would be nice too!)
  • 1/2 teaspoon dried thyme
  • Salt and freshly ground pepper to taste
  • 1-2 tablespoons vegan butter (optional)
  • 1/4 cup toasted hazelnuts, for topping

In a large pot, heat the olive oil over medium heat. Add the onion and cook for 4-6 minutes until translucent. Add the rice and stir so that the rice is coated with the oil and onion mixture. Add the wine and it let it cook for a minute or two, then add a cup of the vegetable broth. Stir frequently and add more broth as the rice soaks it up.

The entire cooking process should take between 20 and 30 minutes; you might not use all the broth and that’s okay. Taste the rice as it begins to soften to test whether it’s done. Towards the end of the cooking process, add the nutritional yeast and spices. Turn off the heat and mash in the squash. Stir in the vegan butter (if using) and add salt and pepper to taste. Top with toasted hazelnuts and serve.

Butternut Squash Risotto with Sage and Toasted Hazelnuts

This beautiful dish is just perfect for fall. Each serving offers modest amounts of protein, iron, and calcium, but this dish is just bursting with vitamin A thanks to the squash. According to the NIH, vitamin A “helps form and maintain healthy skin, teeth, skeletal and soft tissue, mucus membranes, and skin.” (1) It also helps produce pigments in the retina. Vitamin A is fairly simple to obtain in your daily diet; a serving of this risotto offers more than 100% of your daily needs. Orange and yellow fruits and veggies are high in beta carotene, which the body can convert into vitamin A. And now that it’s pumpkin season, I bet we’ll all be taking in lots of vitamin A!

What are your favorite flavor pairings?

Sources cited:

(1) http://www.nlm.nih.gov/medlineplus/ency/article/002400.htm

Hot Pumpkin-Molasses Mug

LVV MoFo 2014 main

Real talk part deux: I nearly considered moving my Lazy Sunday posting schtick to today because, um, it’s Friday night and I’ve got things to do. (“Things” being “sitting around in my flannel PJ pants reading Agatha Christie and maybe drinking some wine if things get crazy.”) And then I thought, No, because “Lazy Friday” just sounds stupid. And then I thought, Maybe I can repurpose my Hot Molasses Mug! Blackstrap molasses has tons of calcium, and so does almond milk! And then I thought, No, you lazy fool. Stop being so lazy.

And then I remembered the Kathy Patalsky’s Hot Pumpkin Mug that I made last year for MoFo, and I realized that those mugs needed to meet. Stat.

Hot Pumpkin-Molasses Mug

Hot Pumpkin-Molasses Mug
Serves one

  • 1 cup unsweetened almond milk
  • 2 tablespoons pumpkin puree
  • 1 tablespoon blackstrap molasses
  • 1/2 tablespoon pure maple syrup
  • 1/4 teaspoon ground cinnamon
  • Dash ground nutmeg
  • Dash salt

Blend all ingredients with a standard blender or an immersion blender until well combined. Transfer to a small saucepan and head over medium-low until the mixture begins to steam. Pour into a mug and enjoy.

~~~

I am, admittedly, still pretty lazy, because this recipe is obscenely easy. But holy heck is it good! It’s the perfect blend of two of my favorite flavors, with just a touch of pumpkin pie spices. And—get this—you will get 65% of your recommended daily value of calcium in this mug. 65%! (Well, assuming you use Trader Joe’s Unsweetened Original Almond Milk…) The iron content is not too shabby either at 24%. Guess my laziness paid off this time!